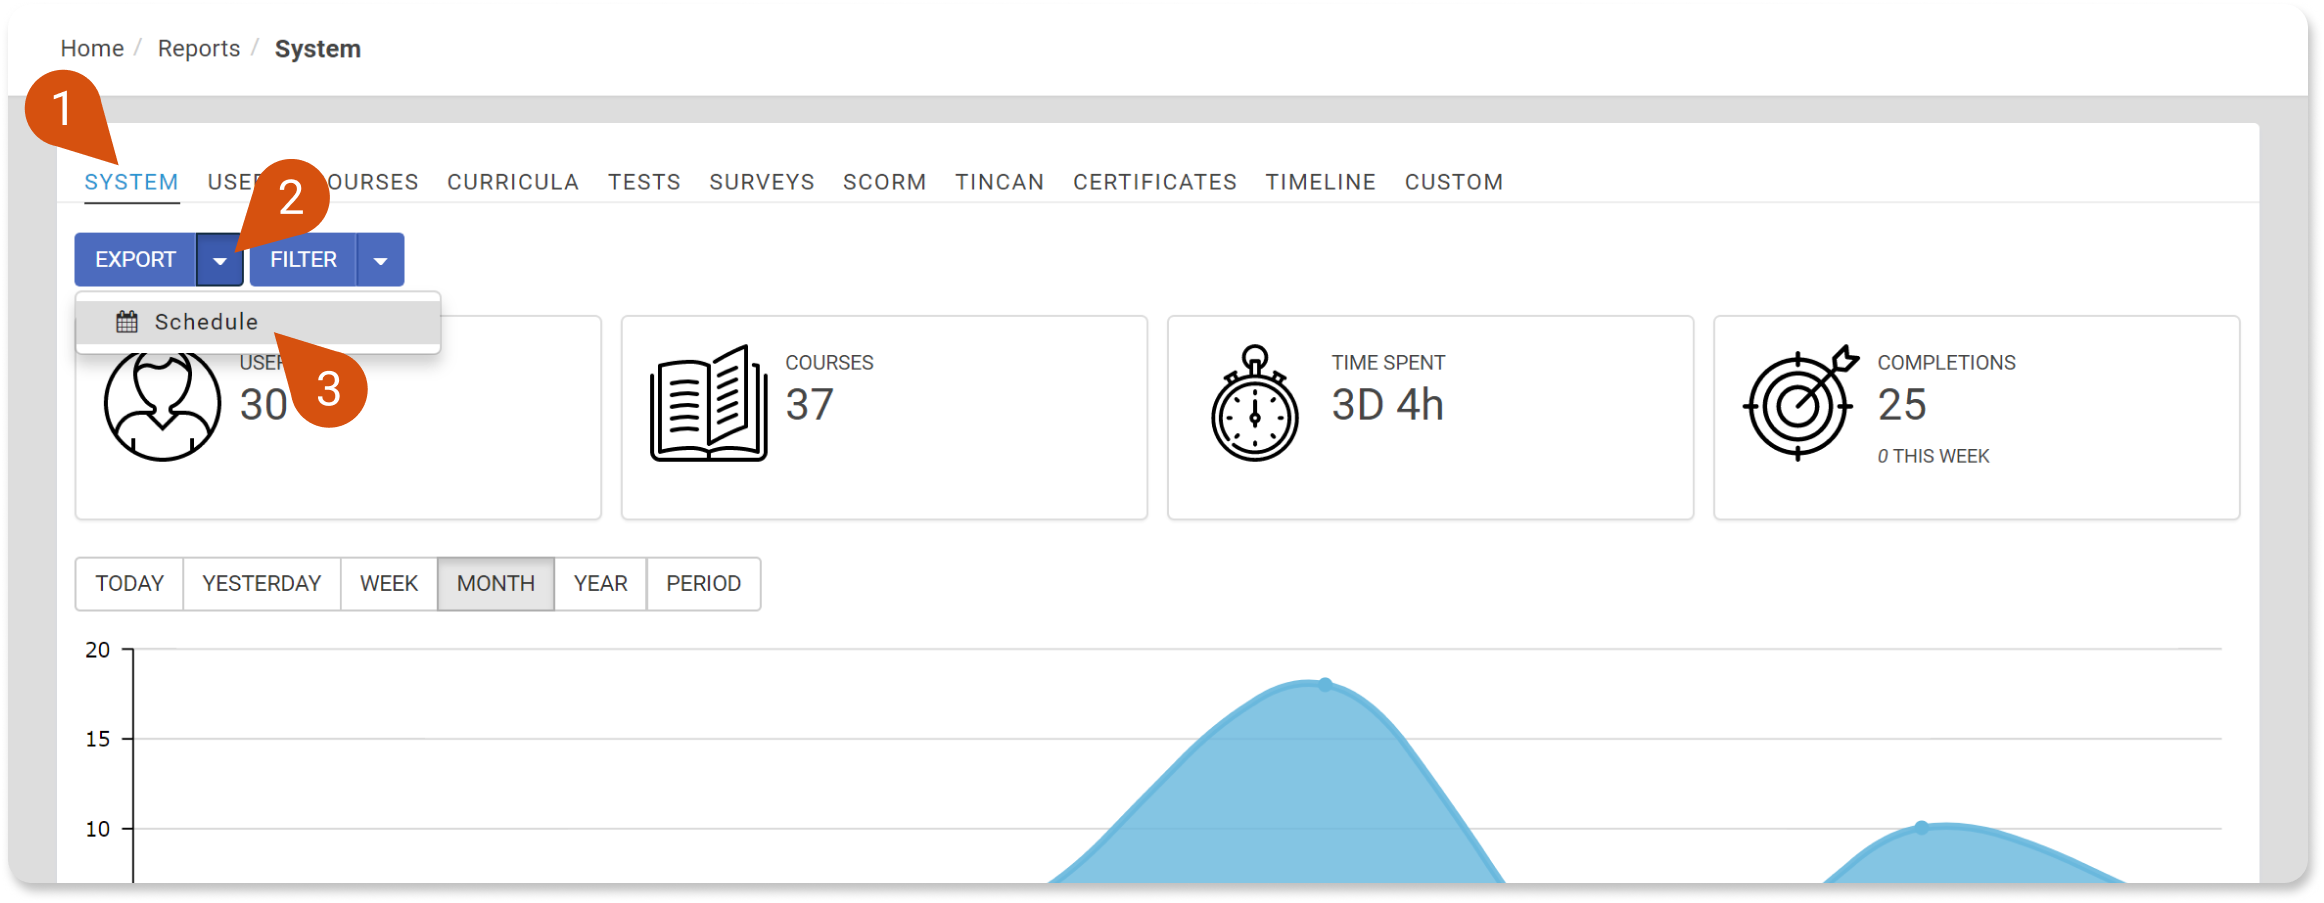
In order to schedule the System reports, visit the System Reports (1) and you will be able to view the Export button (for exporting the system report). Clicking on the cart (2) next to it will give you the option to create a schedule (3) for your System Reports.

Clicking on that option will open a pop-up window for you to set up the details for your schedule.
Once you have set up your schedule, this will be available to edit it again by clicking on the cart. When editing your schedule you will be able to view information about the next time the report is going to run.
Editing the schedule of the report gives you also the option to cancel your schedule if you want (4).
 Note: Make sure you have already set up a periodic system action (e.g. cronjob) for your LMS for the System Reports scheduler to run appropriately.
In order to schedule a User's report, go to the Users reports, select the user you want (1) and click on the arrow next to the Export button (2) to find the Schedule option (3). The next steps are exactly the same as described above.
When it comes to Custom reports, while building it you will find the option to schedule its export at the last step (1). Just enable the scheduled export (2) and set up the schedule you want.