How to work with Branches
Branches allow you to divide your e-learning offering into different logical units (or 'departments'), each with its own courses, Instructors, Learners, and branding (sub-domain, theme, logo, etc.).
Branches can be a flat list or form a nested hierarchy
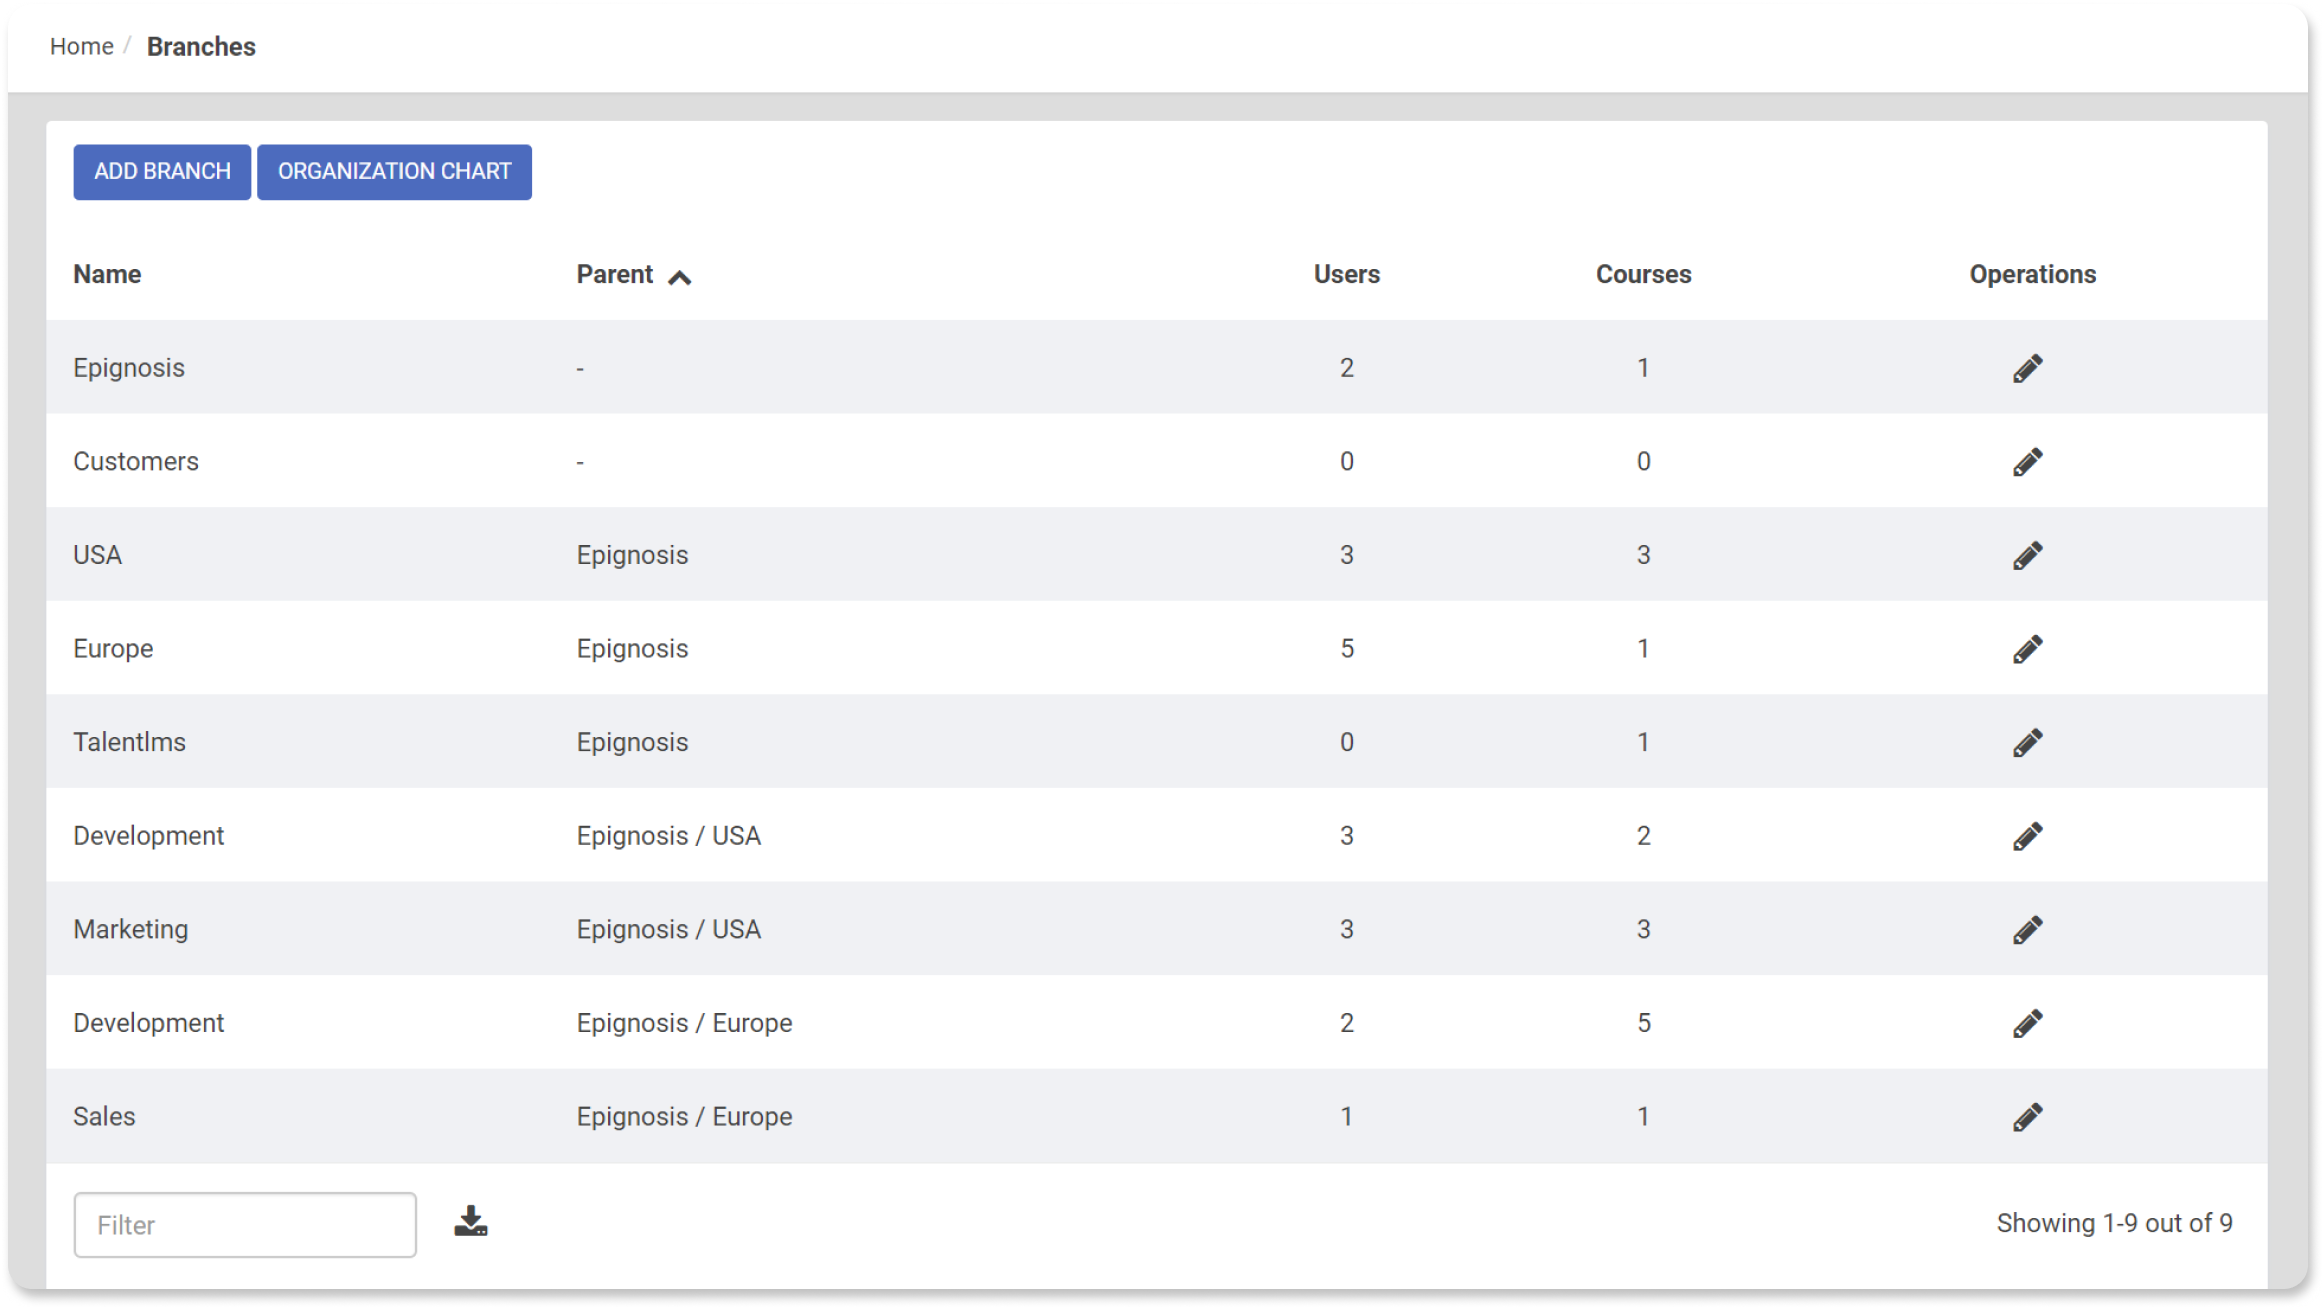
To create a new branch, you would click on the “Add Branch” button
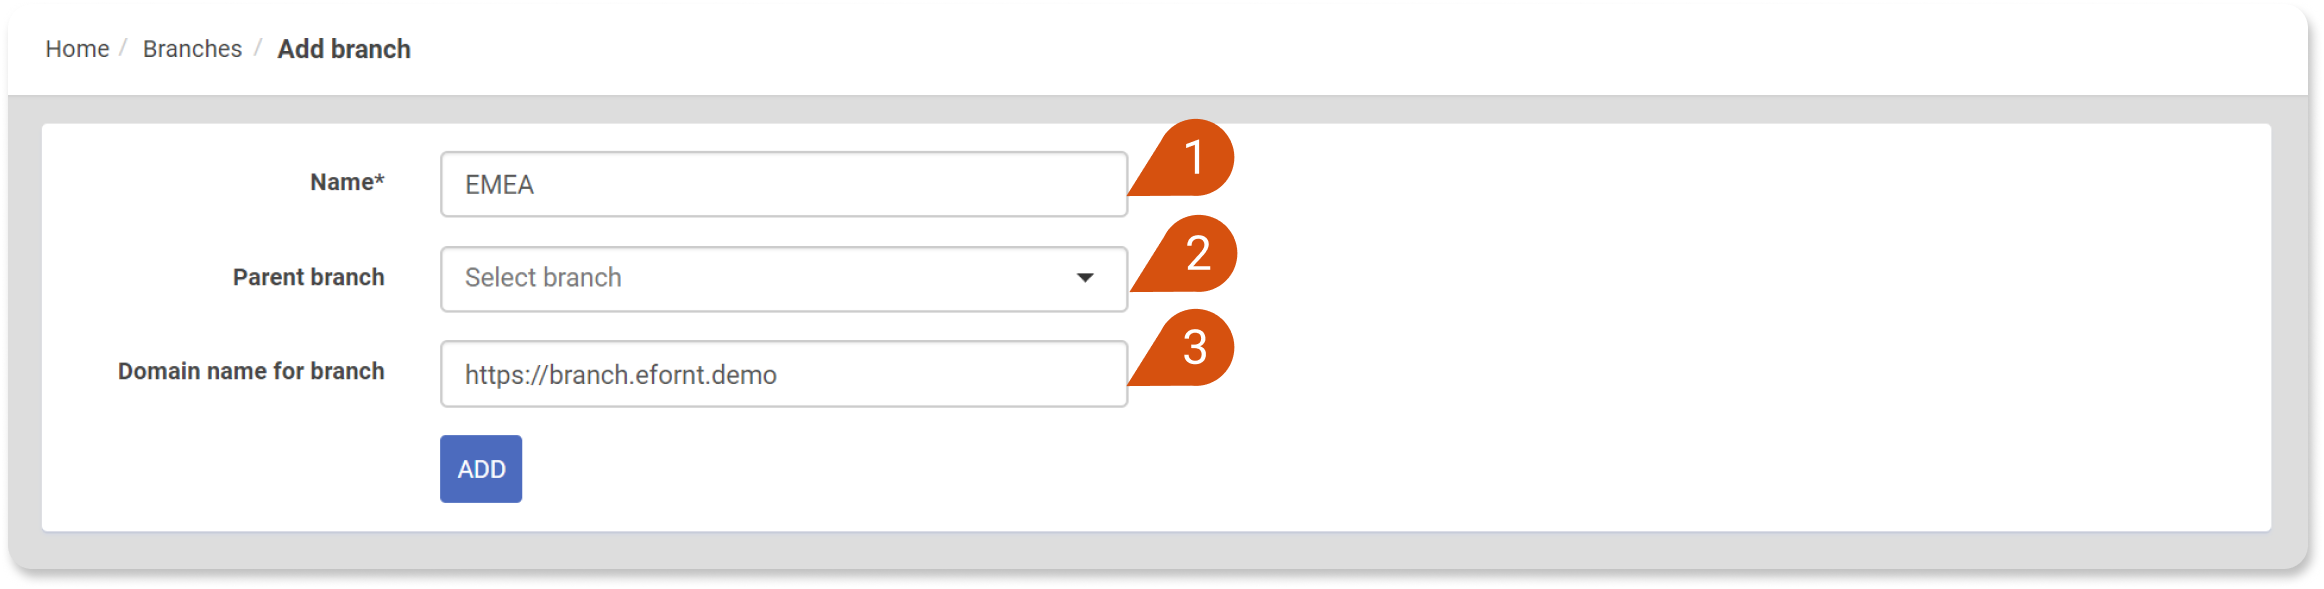
Provide the desired name (1) for the branch, an optional parent branch (2) - if this new branch you are creating would be a child branch of some other branch. Finally, you can provide the desired URL for the branch (3).
The panel for editing an existing branch is similar to the “add branch” panel but also contains tabs to see the branches Users, Courses, Curriculums and extra Settings.
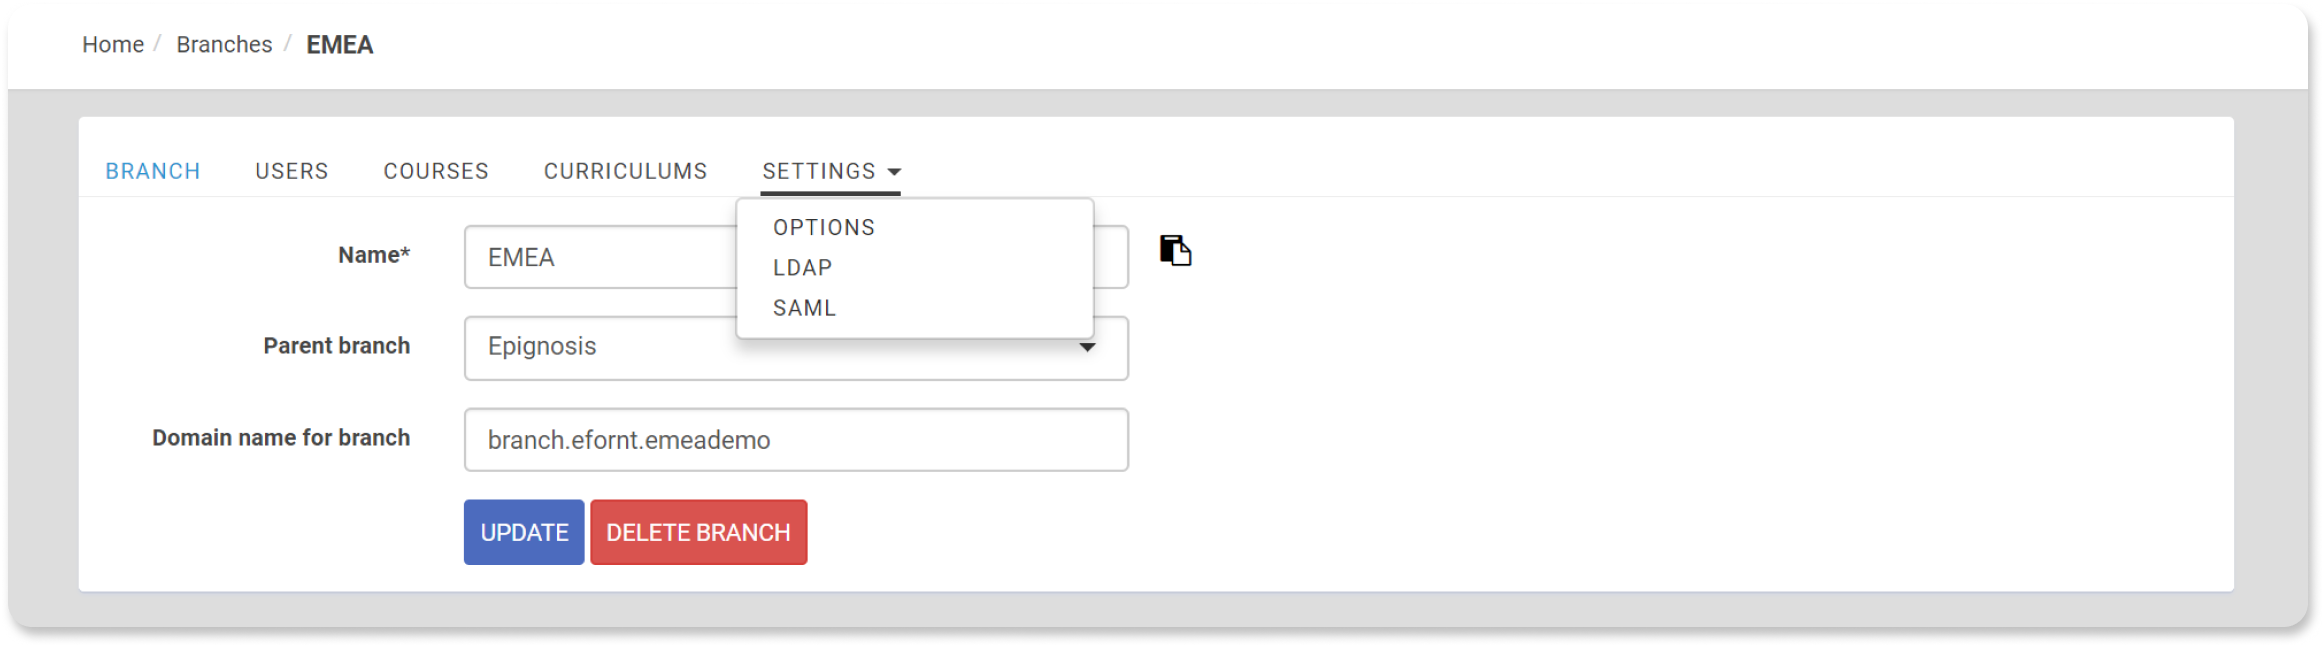
The Users, Courses and Curriculum tabs are simple tabular listings of the Users, Courses, and Curriculums assigned to the branch respectively, and allow you to download this information in Excel-compatible CSV format (1)
In the Settings tab, you would be able to view Options, LDAP and SAML. Regarding LDAP and SAML (2) check out the corresponding articles in our Knowledge Base. You can set up the way users login to this branch.
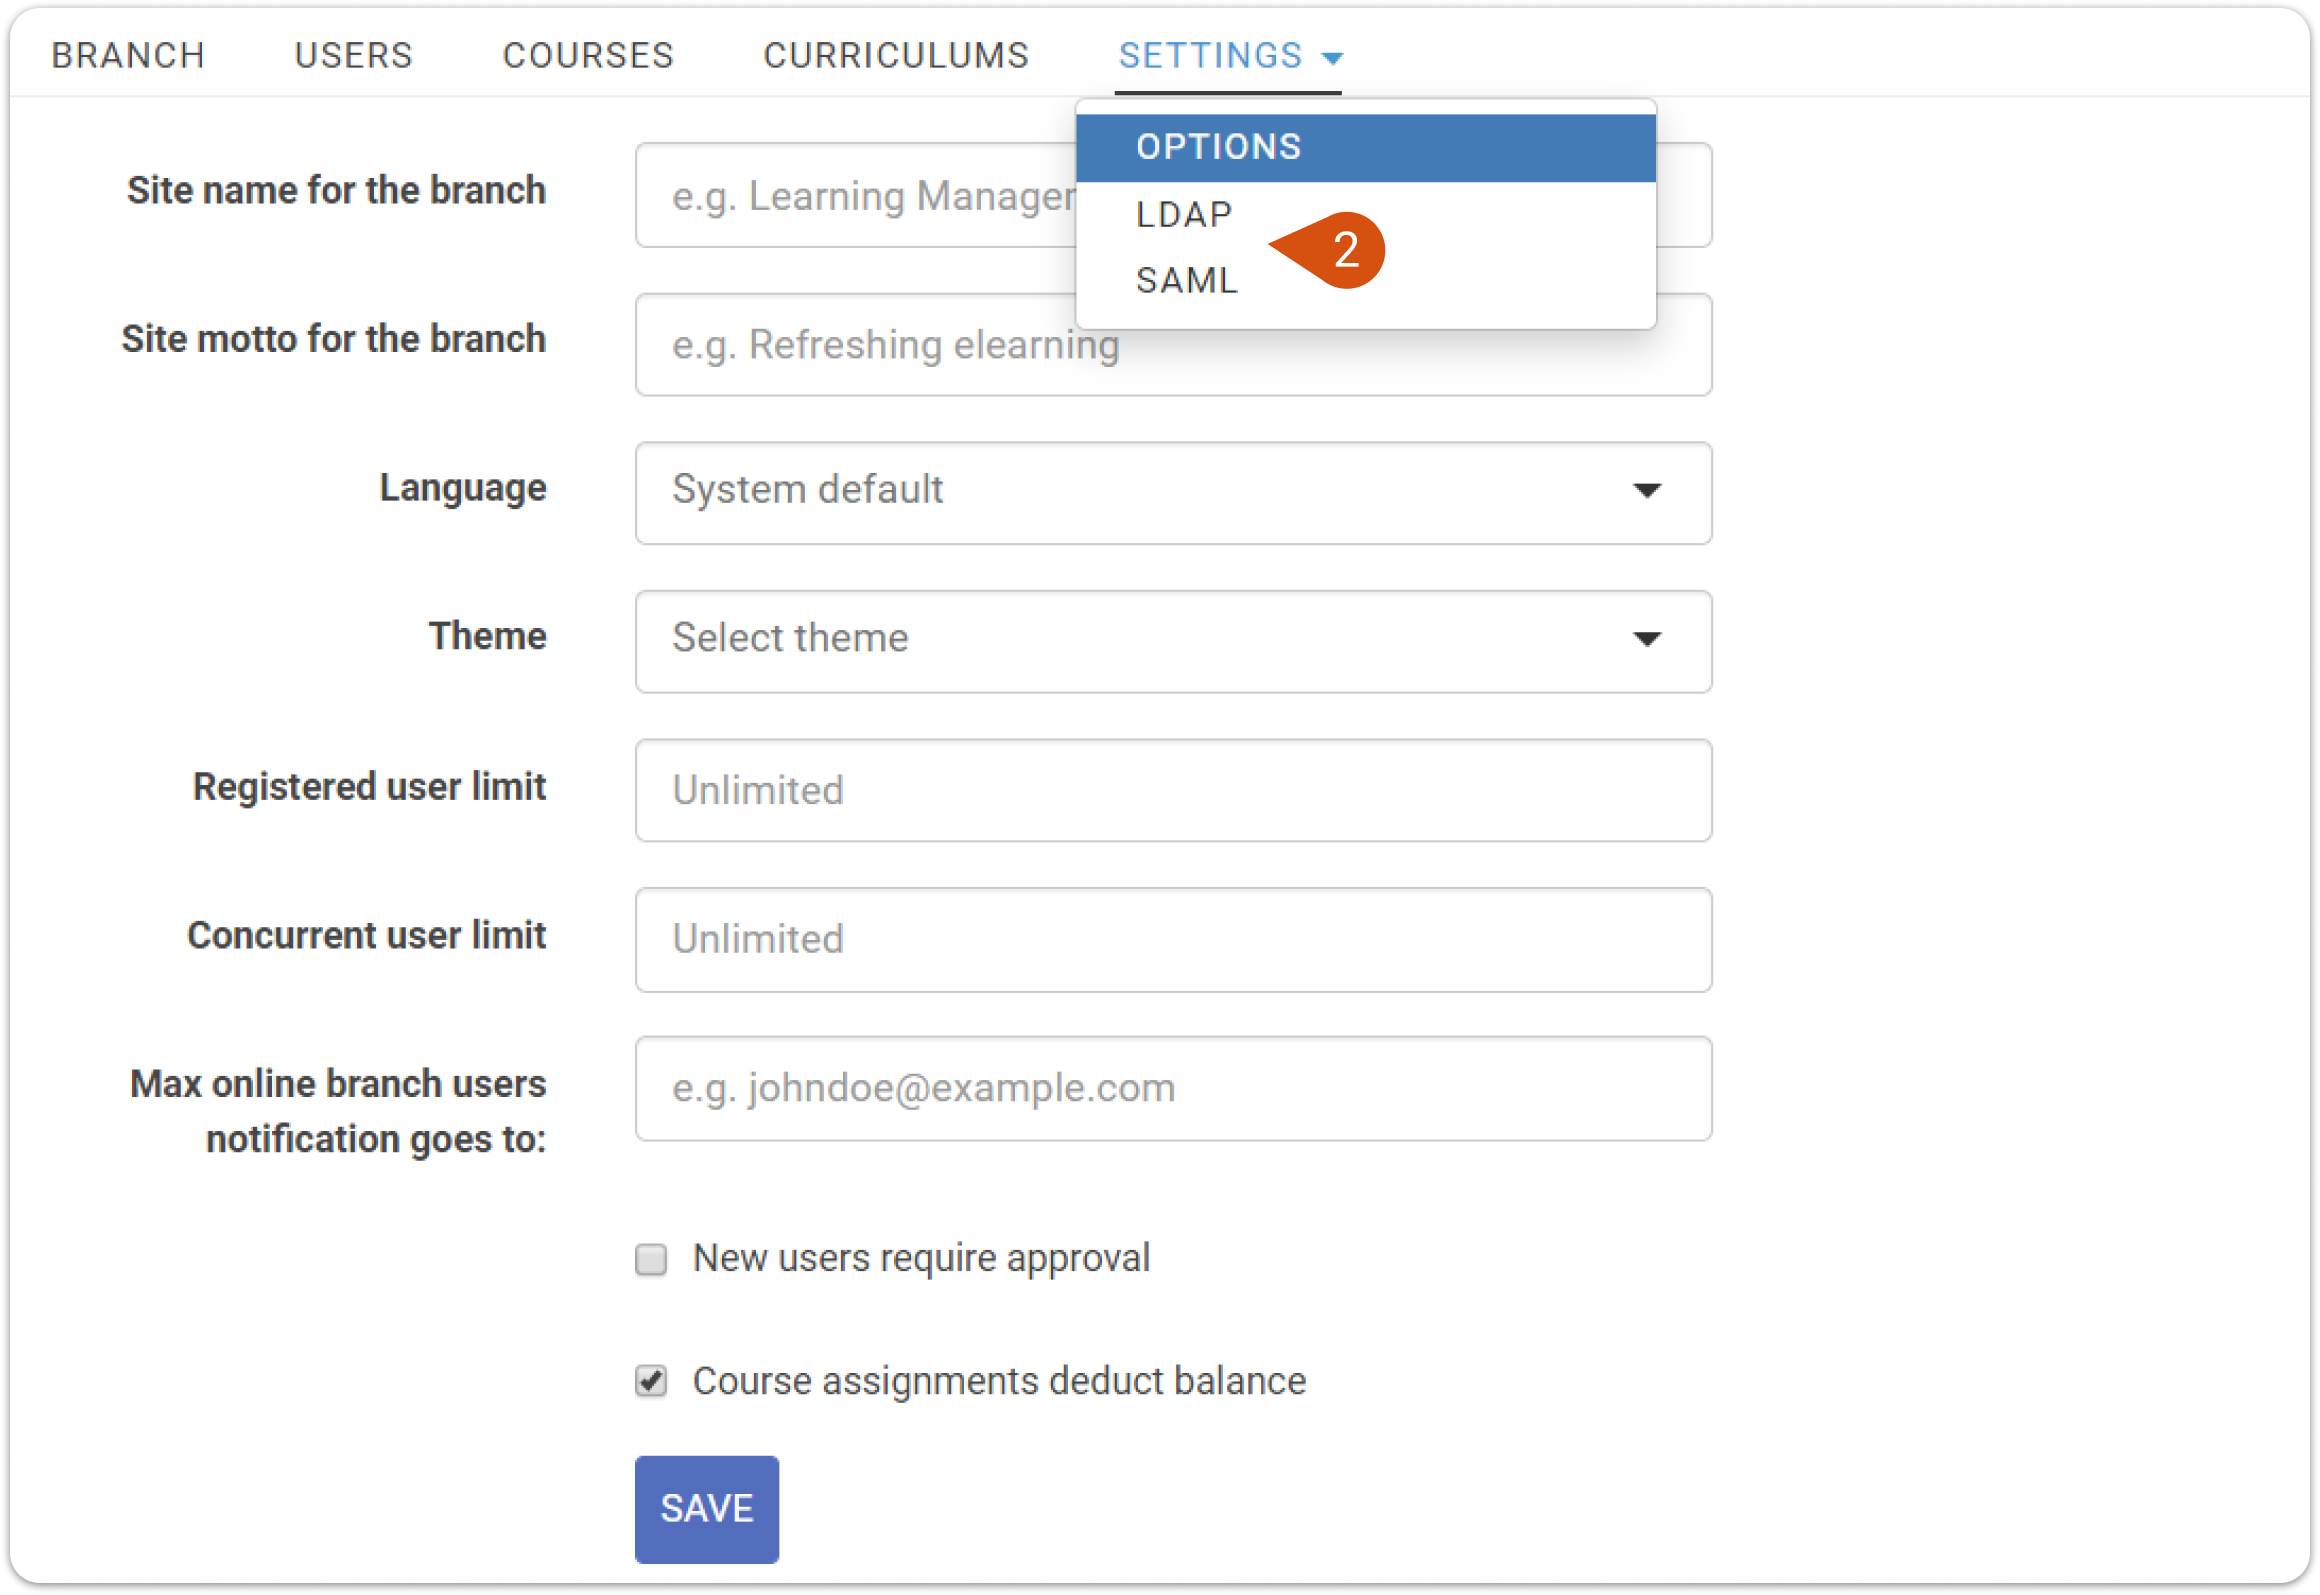
Regarding the Options, these are the settings that concern only this branch. You can set up the following:
- Site name: The site name for this specific branch
- Site motto: The site motto for this specific branch
- Language: The default language for this specific branch
- Theme: The theme for this specific branch
- Registered users limit: use this to set the total number of users allowed to be registered in this branch and its sub-branches. Leave blank for unlimited
- Concurrent users limit: use this to set the total number of users allowed to be logged in to the branch and its sub-branches at the same time. Leave blank for unlimited
- Max online branch users notification goes to: use this to decide which email address is used to inform that the allowed users limit in the branch has been reached
- New users require approval: Check this if the system administrator should approve any new users that are created by the branch admin
- Course assignments deduct balance: Check this if you require the branch administrators to pay for the courses assigned to their users, using their balance
Related Articles
What is the difference between Branches and Groups?
The LMS was designed to offer customization options in order to cater to how different organizations and businesses operate. To keep these customizations simple, we based it on a few key organizational entities, such as Branches and Groups. While ...How to work with Learning Paths
Learning paths are a selection of courses grouped into blocks. They allow Learners to progress through and master specific subjects. Similar to Curricula, learning paths allow you to enroll multiple Learners in multiple courses at once, saving you ...How does the Discussion feature work?
Each discussion corresponds to a course and is created during course creation. You cannot create any discussion unrelated to any course. All user types can create discussions and reply to their topics. Their permissions can be controlled through the ...Types of Reports Available
System reports (of the whole portal or by branch for branch-admins) Timeline events Custom Reports Concurrent Users information Infographics Users Courses Curricula Tests (Users and Analysis sections) Surveys SCORM TinCan Certificates System and ...How do I set a limit to the number of Branch users?
In this guide, we will demonstrate how administrators can set user limits with a specific Branch. Step 1: Login to your administrator account and click on the "Branches" options. Step 2: Select a Branch from the available existing branches. Step 3: ...