How to log into the LMS with your Google credentials
It is possible to integrate your LMS portal with your Google account so that you can log in as an Administrator with your Google credentials.
To set up and activate Google Single Sign-on or Google SSO, first sign into both your Google account and your LMS portal.
Stage 1 - Setting up your Google account for the integration
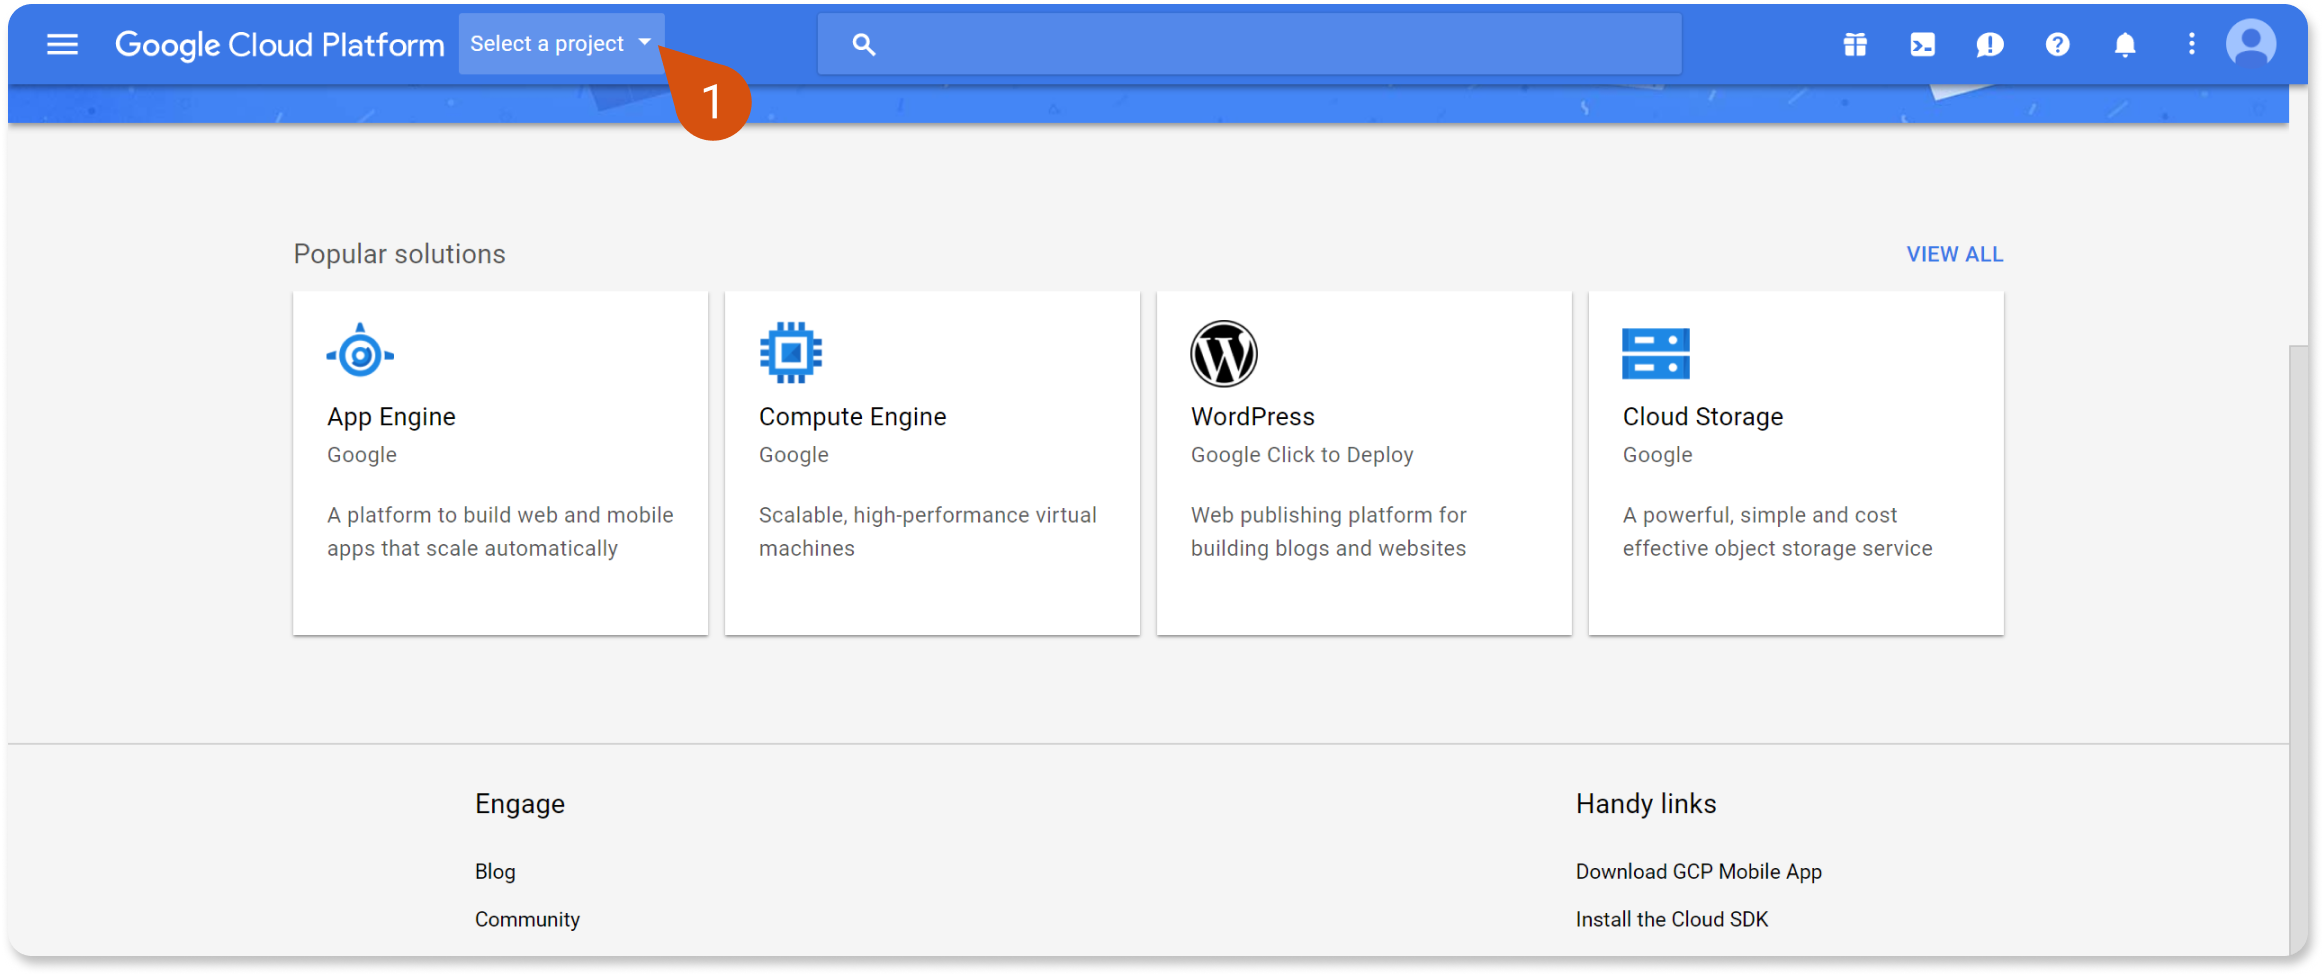
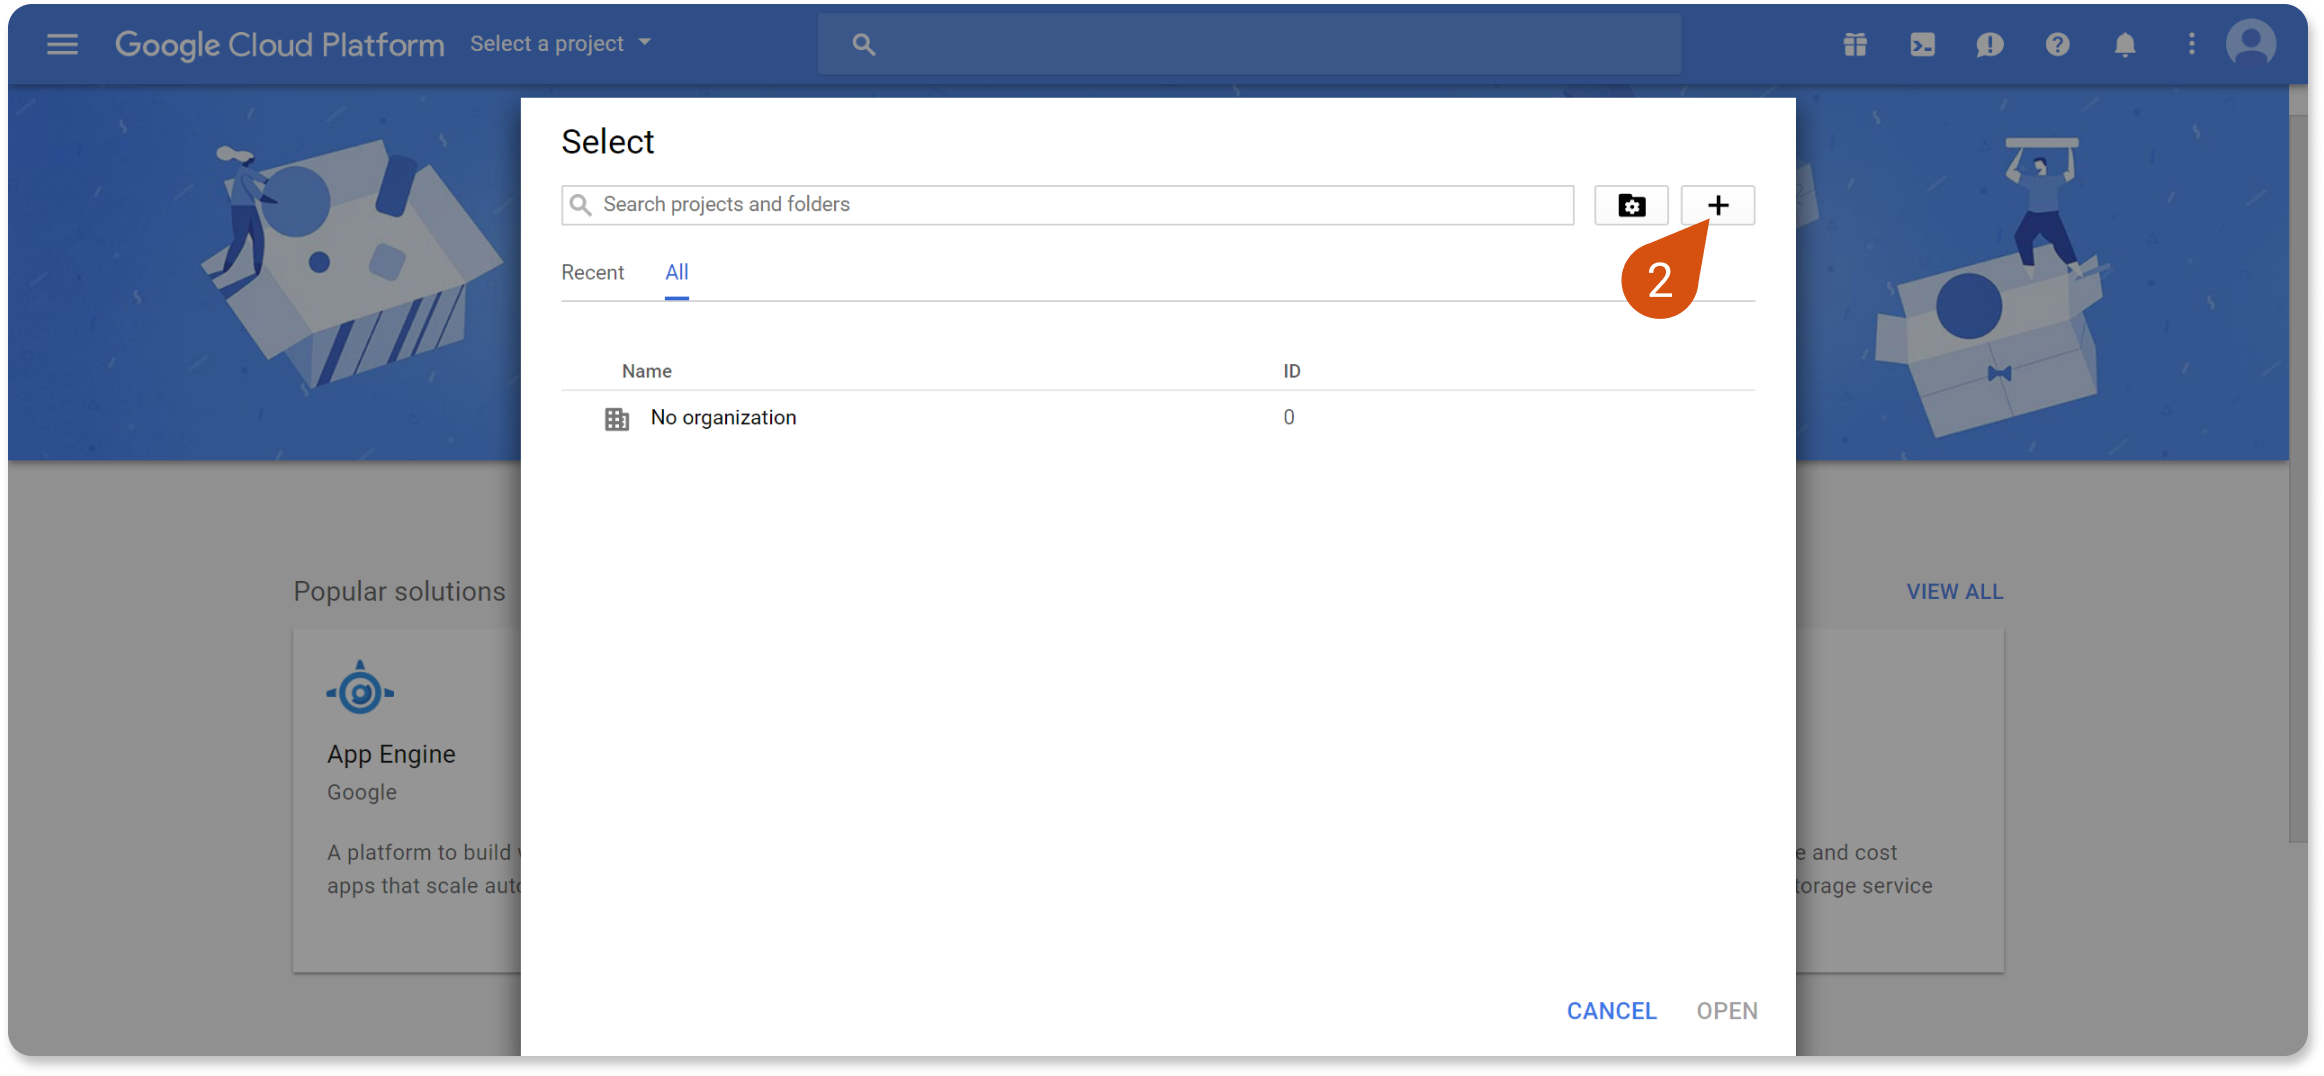
Sign in to https://console.cloud.google.com/ with the Google account you want to use for LMS. Click on "Select a project" (1). In the modal window, click on the "+" button (2) (on the top right) to create a new project.


Enter a name for your project in the "Project name" field (e.g., LMS or LMSSSO) and click on "Create" (3).
After the new project is created, you receive a notification. To open your project's page either click on the "wrench" icon (4) in the notifications panel or click on "Select a project" and then on the project's name (5) in the modal window.
On the new project's dashboard, click on the "triple-bar" icon (6) (on the top left) and then on the "APIs & Services" tab (7). From the drop-down list, click on the "Credentials" (8) option.
After clicking on "Save", the "APIs - Credentials" modal window pops up.
On the "Create client ID" page, start by selecting "Web application" from the "Application type" list (14) and filling out the "Name" field (e.g., LMS, LMSSSO, etc.). Then, fill out both the "Authorized JavaScript Origin" and "Authorized Redirect URIs" fields with your portal's root URL (15) and click on "Create" (16) to proceed.
Note: Type your LMS homepage address with "https://" instead of "http://" and without the "/start" part. E.g., if your portal's homepage address was "http://abcxyz.learning.com/start" you would use "https://abcxyz.learning.com" instead.
After clicking on "Create" a modal window pops up with your newly created "OAuth client" ID. Copy the OAuth "client ID" (17) and "client secret" (18) by clicking on the "document" icons.
Stage 2 - Integrating Google SSO with your LMS portal
Log in to your LMS portal, go to the "System Settings" page and click on "Single Sign-On" (19). Go to the "Google Sign In" tab (19) and activate the "Enable Google Sign in" option (20). In the "OAuth Client ID" field fill out your client ID (21) and click on "Save" (22) to proceed.
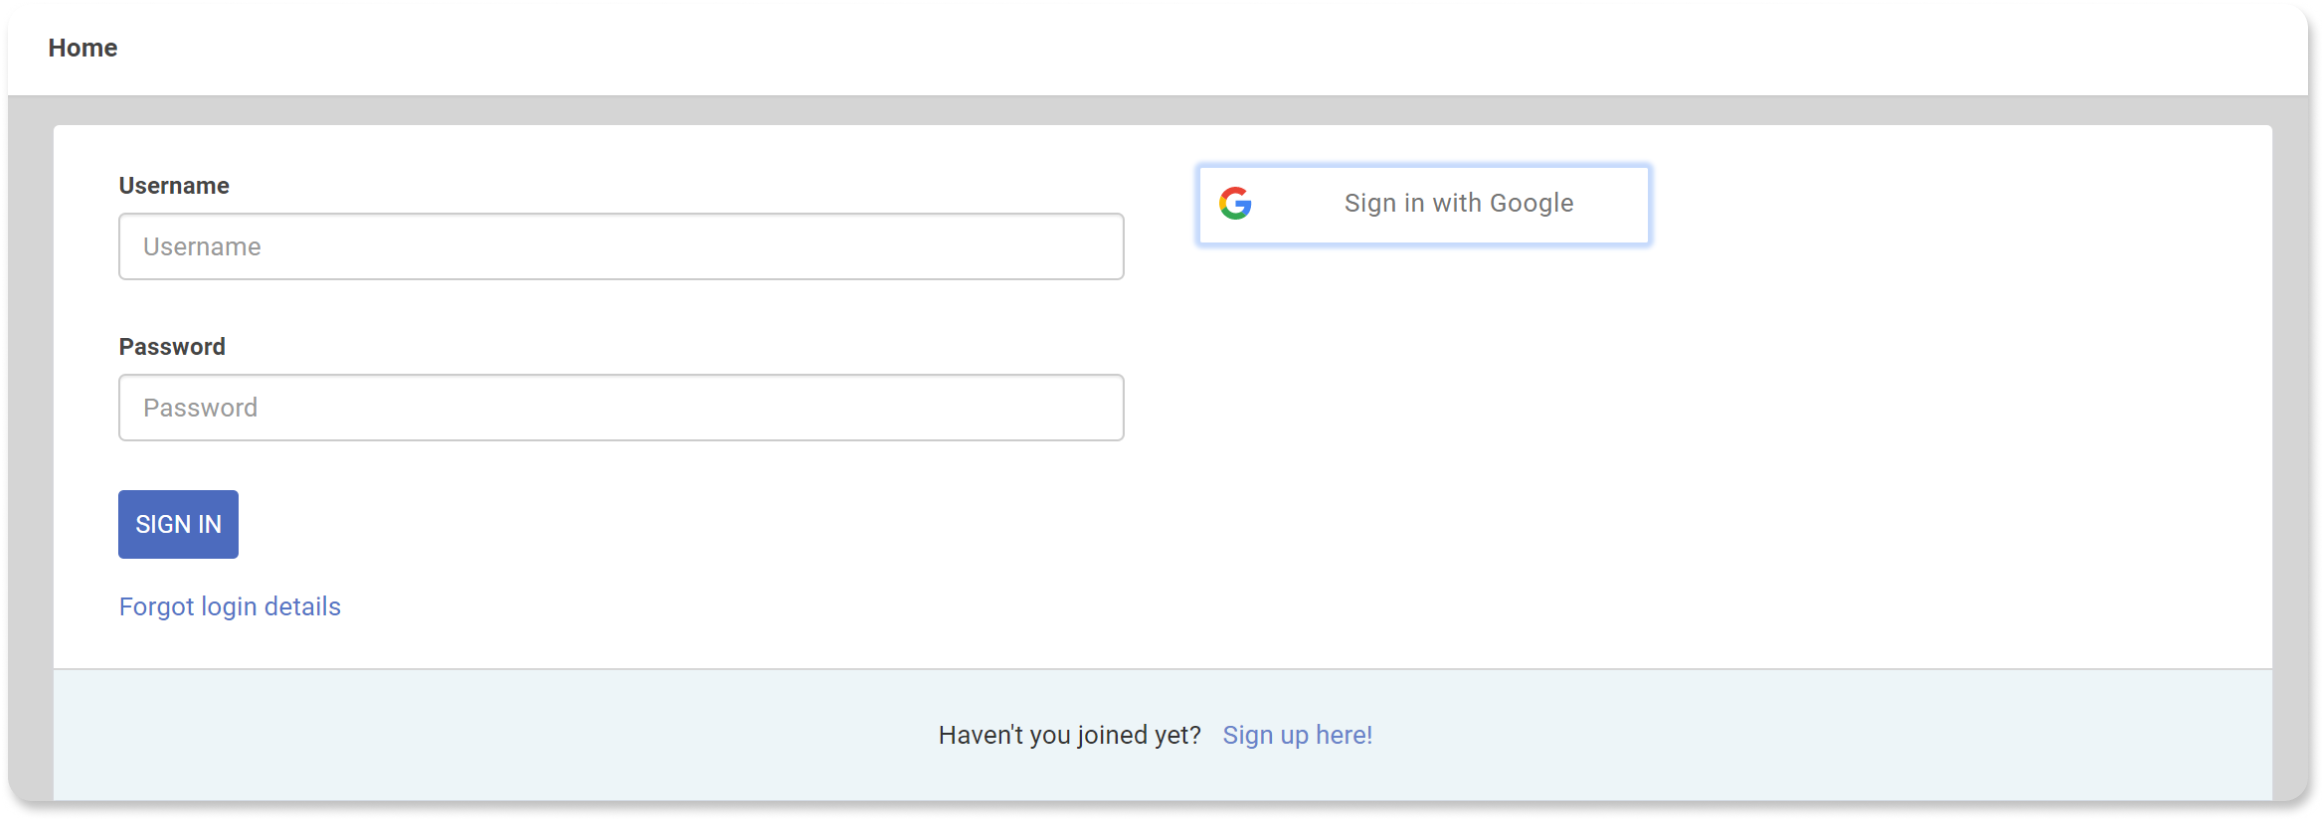
After clicking on "Save", you receive a confirmation message that the operation is completed successfully. You now have the option to log in to your LMS portal with your Google credentials. Click on "Sign in with Google" to check for yourself by logging in and out of your portal.

Note: If you do not see a "Sign in with Google" button, as shown above, delete your browser's cache and cookies or log in from an incognito window. Also, keep in mind that what you see might vary depending on your browser and Google account settings.
After clicking on "Sign in with Google", simply select the Google account you have already set up to work with LMS (23) and proceed to your portal.
Related Articles
How to Access The New LMS Course Catalog
How to Access The New LMS Course Catalog The course catalog has received a significant update, making it easier for users to search for and add interactive courses to enrich their learning experience. This article will detail how you can access the ...How to set up your LMS DNS Record
Step 1: Purchase a Domain Name (if not already owned). Step 2: From your domain registrar provider, access Domain DNS Settings: Log in to your domain registrar's account. Navigate to the DNS (Domain Name System) settings or DNS management section for ...How to Access The New LMS Course Catalog
The course catalog has received a significant update, making it easier for users to search for and add interactive courses to enrich their learning experience. This article will detail how you can access the new course marketplace and integrate ...One on One LMS Integrations and Third Party Applications
Video Conference Revitalize your training with webinars, ILT, and collaborative sessions using the leading video conferencing softwares.. Zoom Zoom, the foremost video conferencing and webinar tool, enables you to host virtual and live training ...How to add Google Analytics to your portal
To add Google Analytics to your website, copy the code provided by Google and paste it into the "Embed Code" section of your website's theme settings. Make sure to do this in the theme that you're currently using, and follow these steps: 1. Sign in ...