Table of contents
- Step 1: Enable SAML support in your portal.
- Step 2: Create LMS application in Azure AD.
- Step 3: Allow users to access LMS application.
- Step 4: Add the Azure AD Single sign-on configuration date to LMS SAML settings.
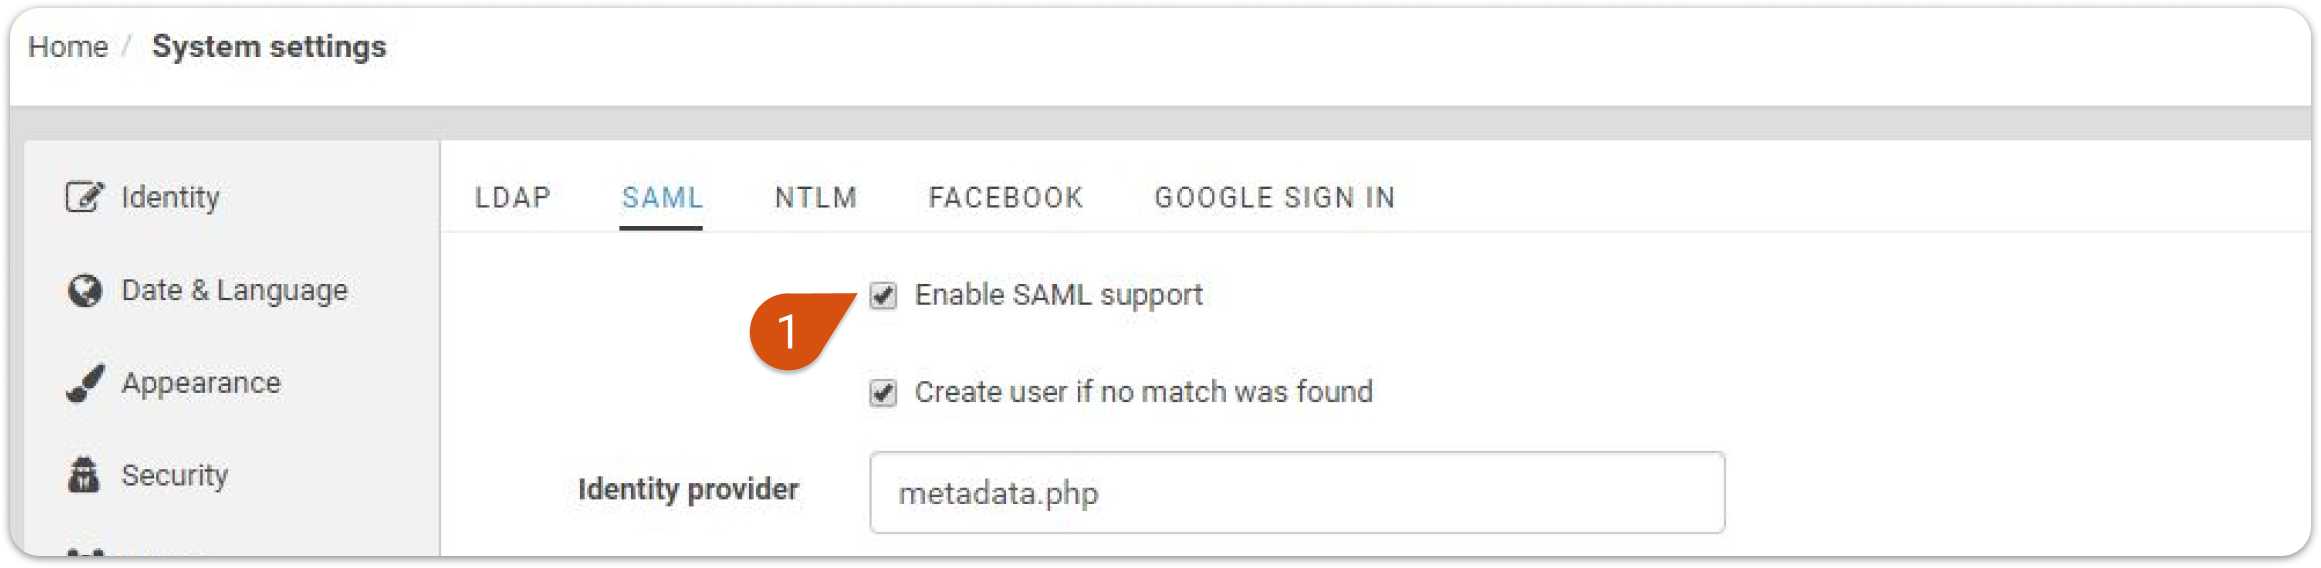
Step 1: Enable SAML support in your portal.
1. Sign in to your LMS account as the main Administrator.
2. Select Home > System settings > Single Sign On > SAML.
3. Check option Enable SAML support (1).
Step 2: Create One on On eapplication in Azure AD.
1. Open the Microsoft Azure portal and select Azure Active Directory (1).
2. In the Manage list select Enterprise applications (2). On the panel that appears, click New application (3).
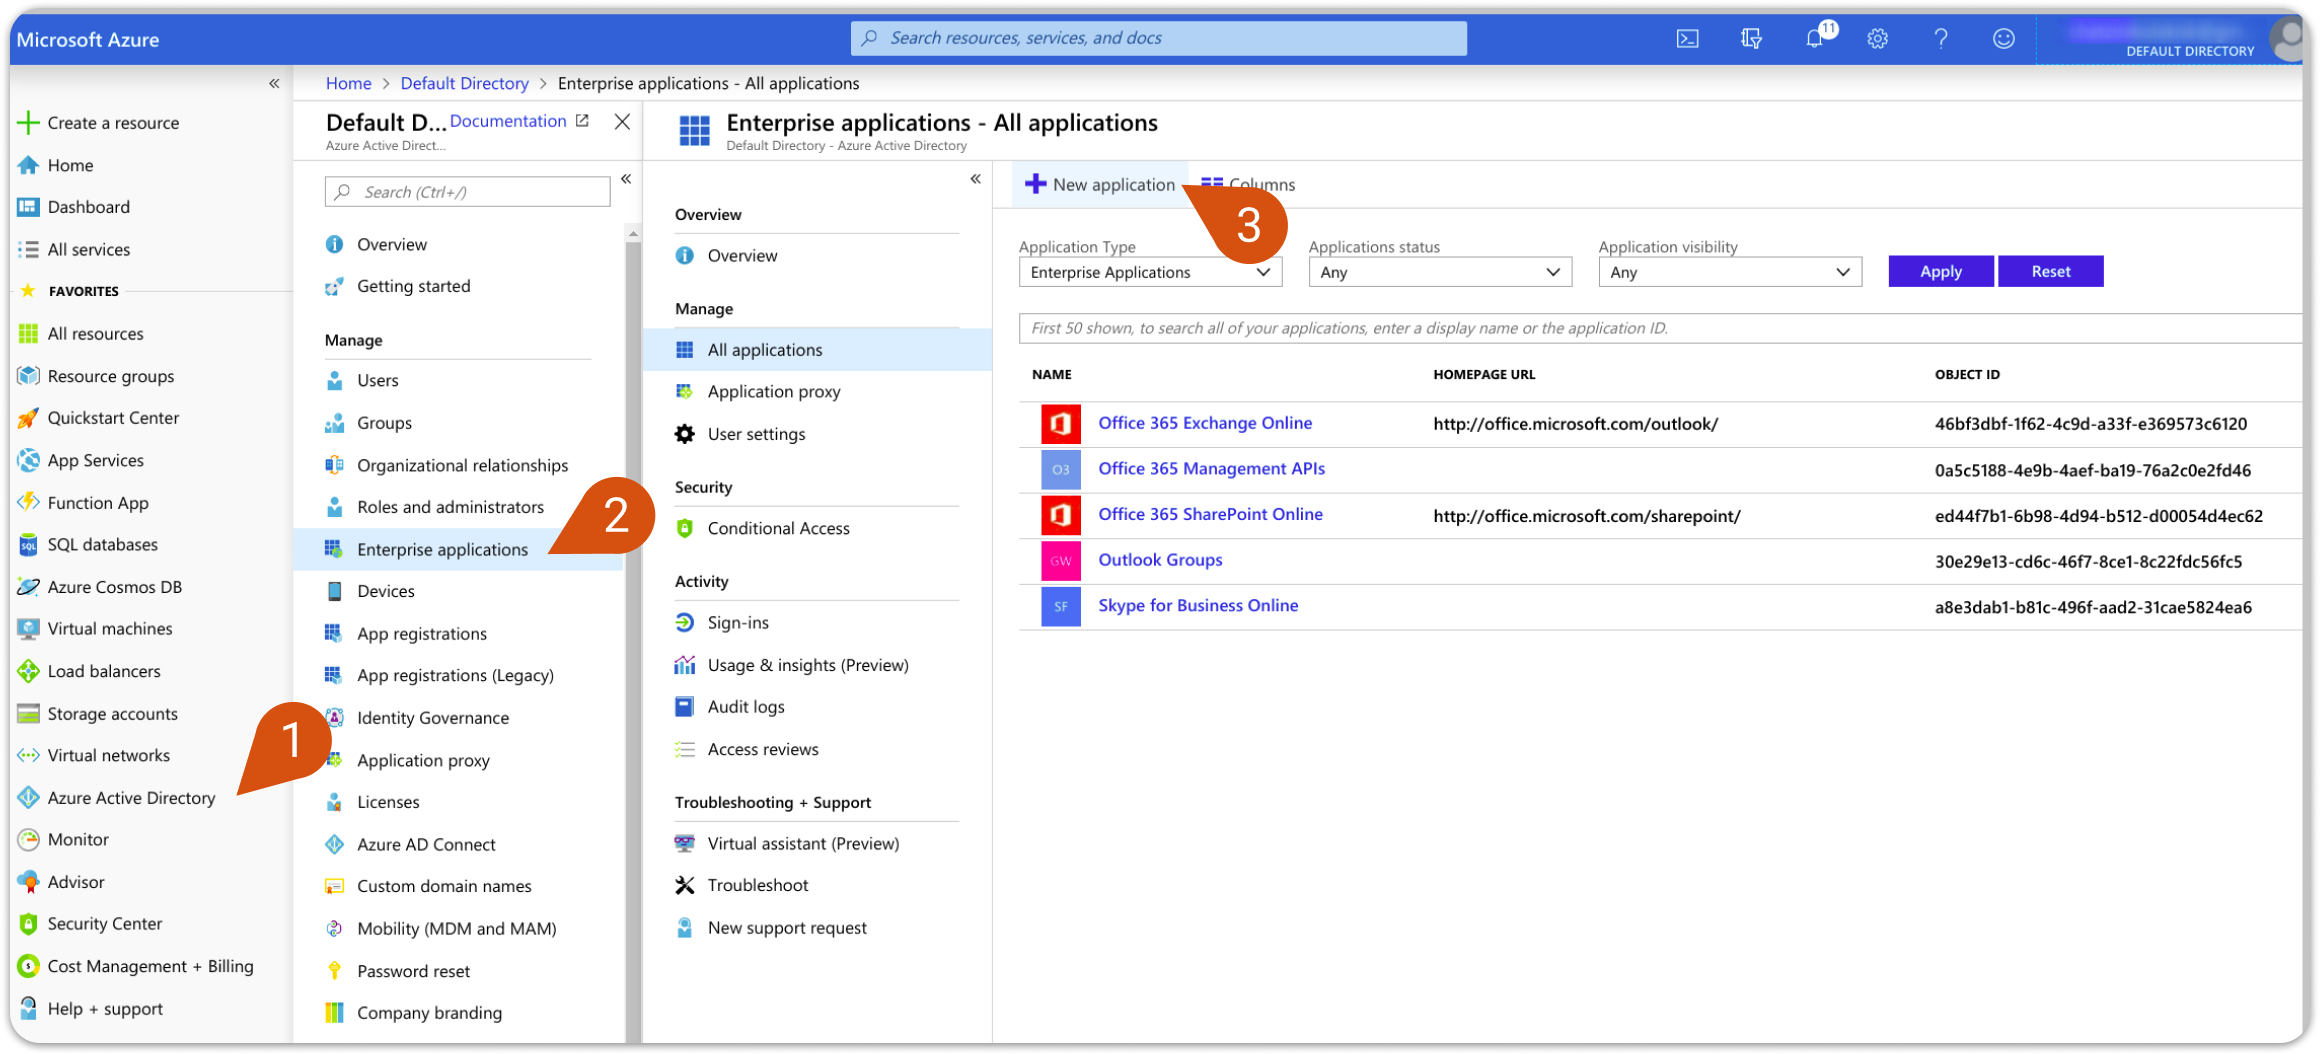
3. Select Non-gallery application (1), set a name (2), click Add (3) and wait for it to be created.
Step 3: Allow users to access LMS application.
1. You can find the LMS application in Azure Active Directory > Enterprise applications > One on One.
2. In the Manage list, select Users and groups (1). On the panel that appears, click Add user (2).
3. Add the users/groups you want from the list, or by searching for them and by clicking Select.
4. When all the users/groups have been selected click Assign.
Step 4: Add the Azure AD Single sign-on configuration date to LMS SAML settings.
1. Open the LMS application, you can find it in Azure Active Directory > Enterprise applications > One on One.
2. In the Manage list, select Single sign-on (1). On the panel that appears, click SAML (2).
3. Azure AD SAML configuration has 5 different sections, which you will need to edit.
Proceed with editing the first section.
Click on the editing icon (Basic SAML Configuration, top-right corner). You will need to add the respective URL from LMS SAML settings to Azure AD. To do that, access your LMS portal as System Administrator and go to Home > System settings > Single Sign-On > SAML. Enter the URLs in Azure AD - Basic SAML Configuration:
| Identifier (1) | Your LMS Main URL |
| Reply URL (2) | Assertion Consumer Service URL |
| Logout URL (3) | Single Logout Service URL |
| Note: In the following images you will see matching numbers. You will need to transfer the URLs from LMS settings (images 1 and 2) to Azure AD settings (image 3). Use the numbers to match the respective information. |
Image 1
Image 2
Image 3
| Note: If you are setting up SAML at a Branch level, the Main URL is replaced with the domain name of the branch that can be found in Home > Branches > Branch name > Domain name for branch. |
4. When you are done select Save and proceed with editing the second section in Azure, User Attributes and Claims. This section is about the information Azure will send to LMS, so you will be doing the reverse process.
The URLs on the left called claims will need to be copied to LMS relevant SAML fields. Copy and paste the Azure value to the corresponding LMS SAML field. Here is a table for your convenience.
| Azure Value | LMS SAML field |
| user.mail (1) | TargetedID, Email |
| user.givenname (2) | First name |
| user.surname (3) | Last name |
| Note: In the following images you will see matching numbers. You will need to transfer the URL from Azure AD settings (image 4) to LMS SAML settings (image 5). Use the numbers to match the respective information. |
Image 4
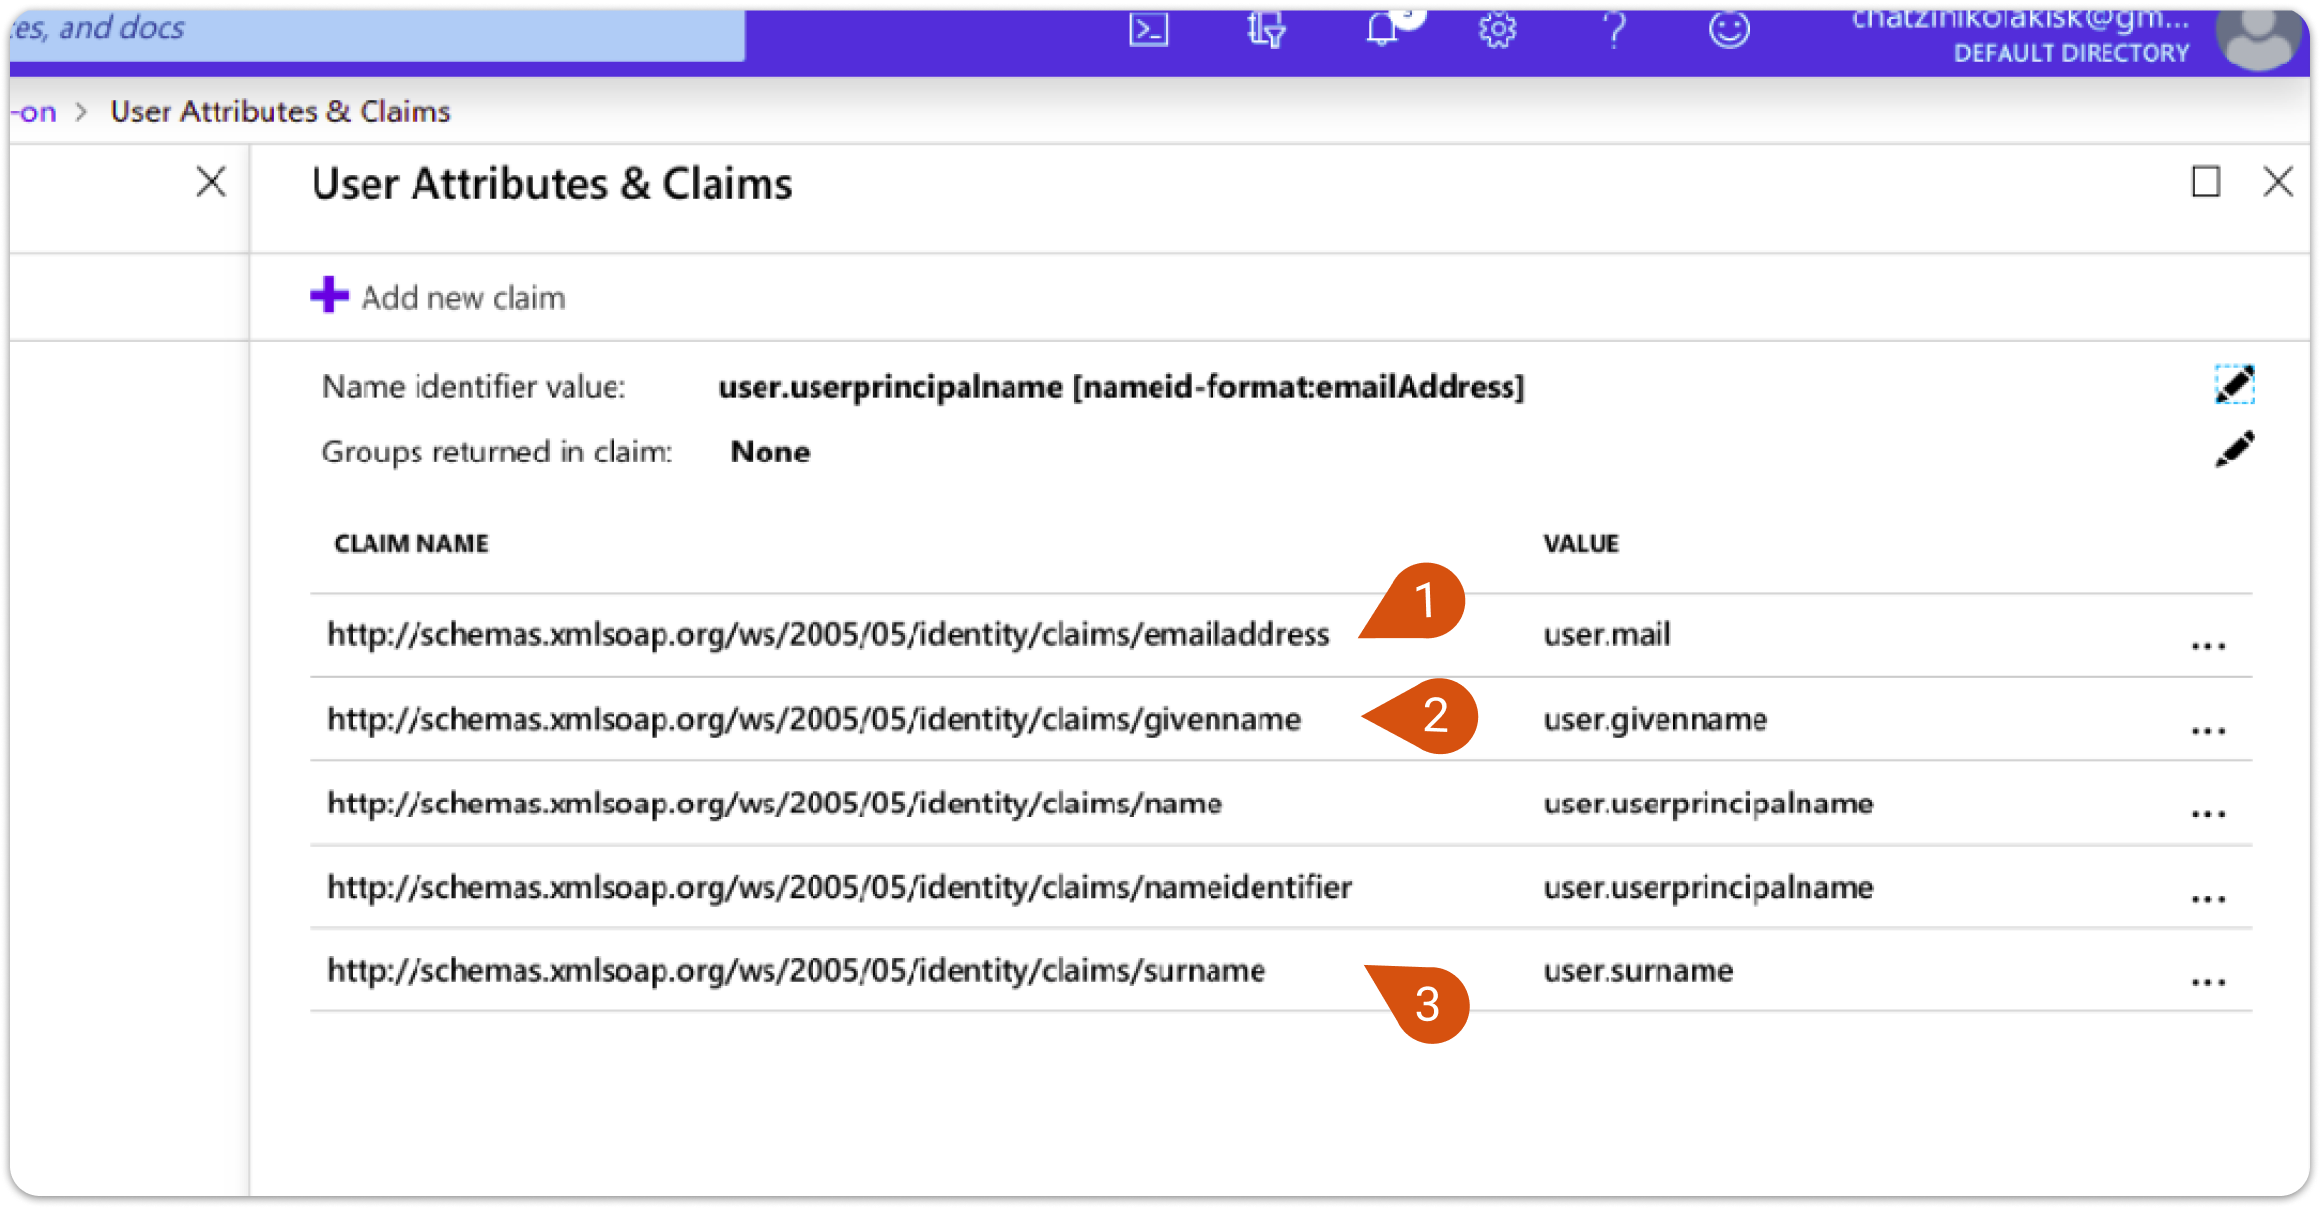
Image 5
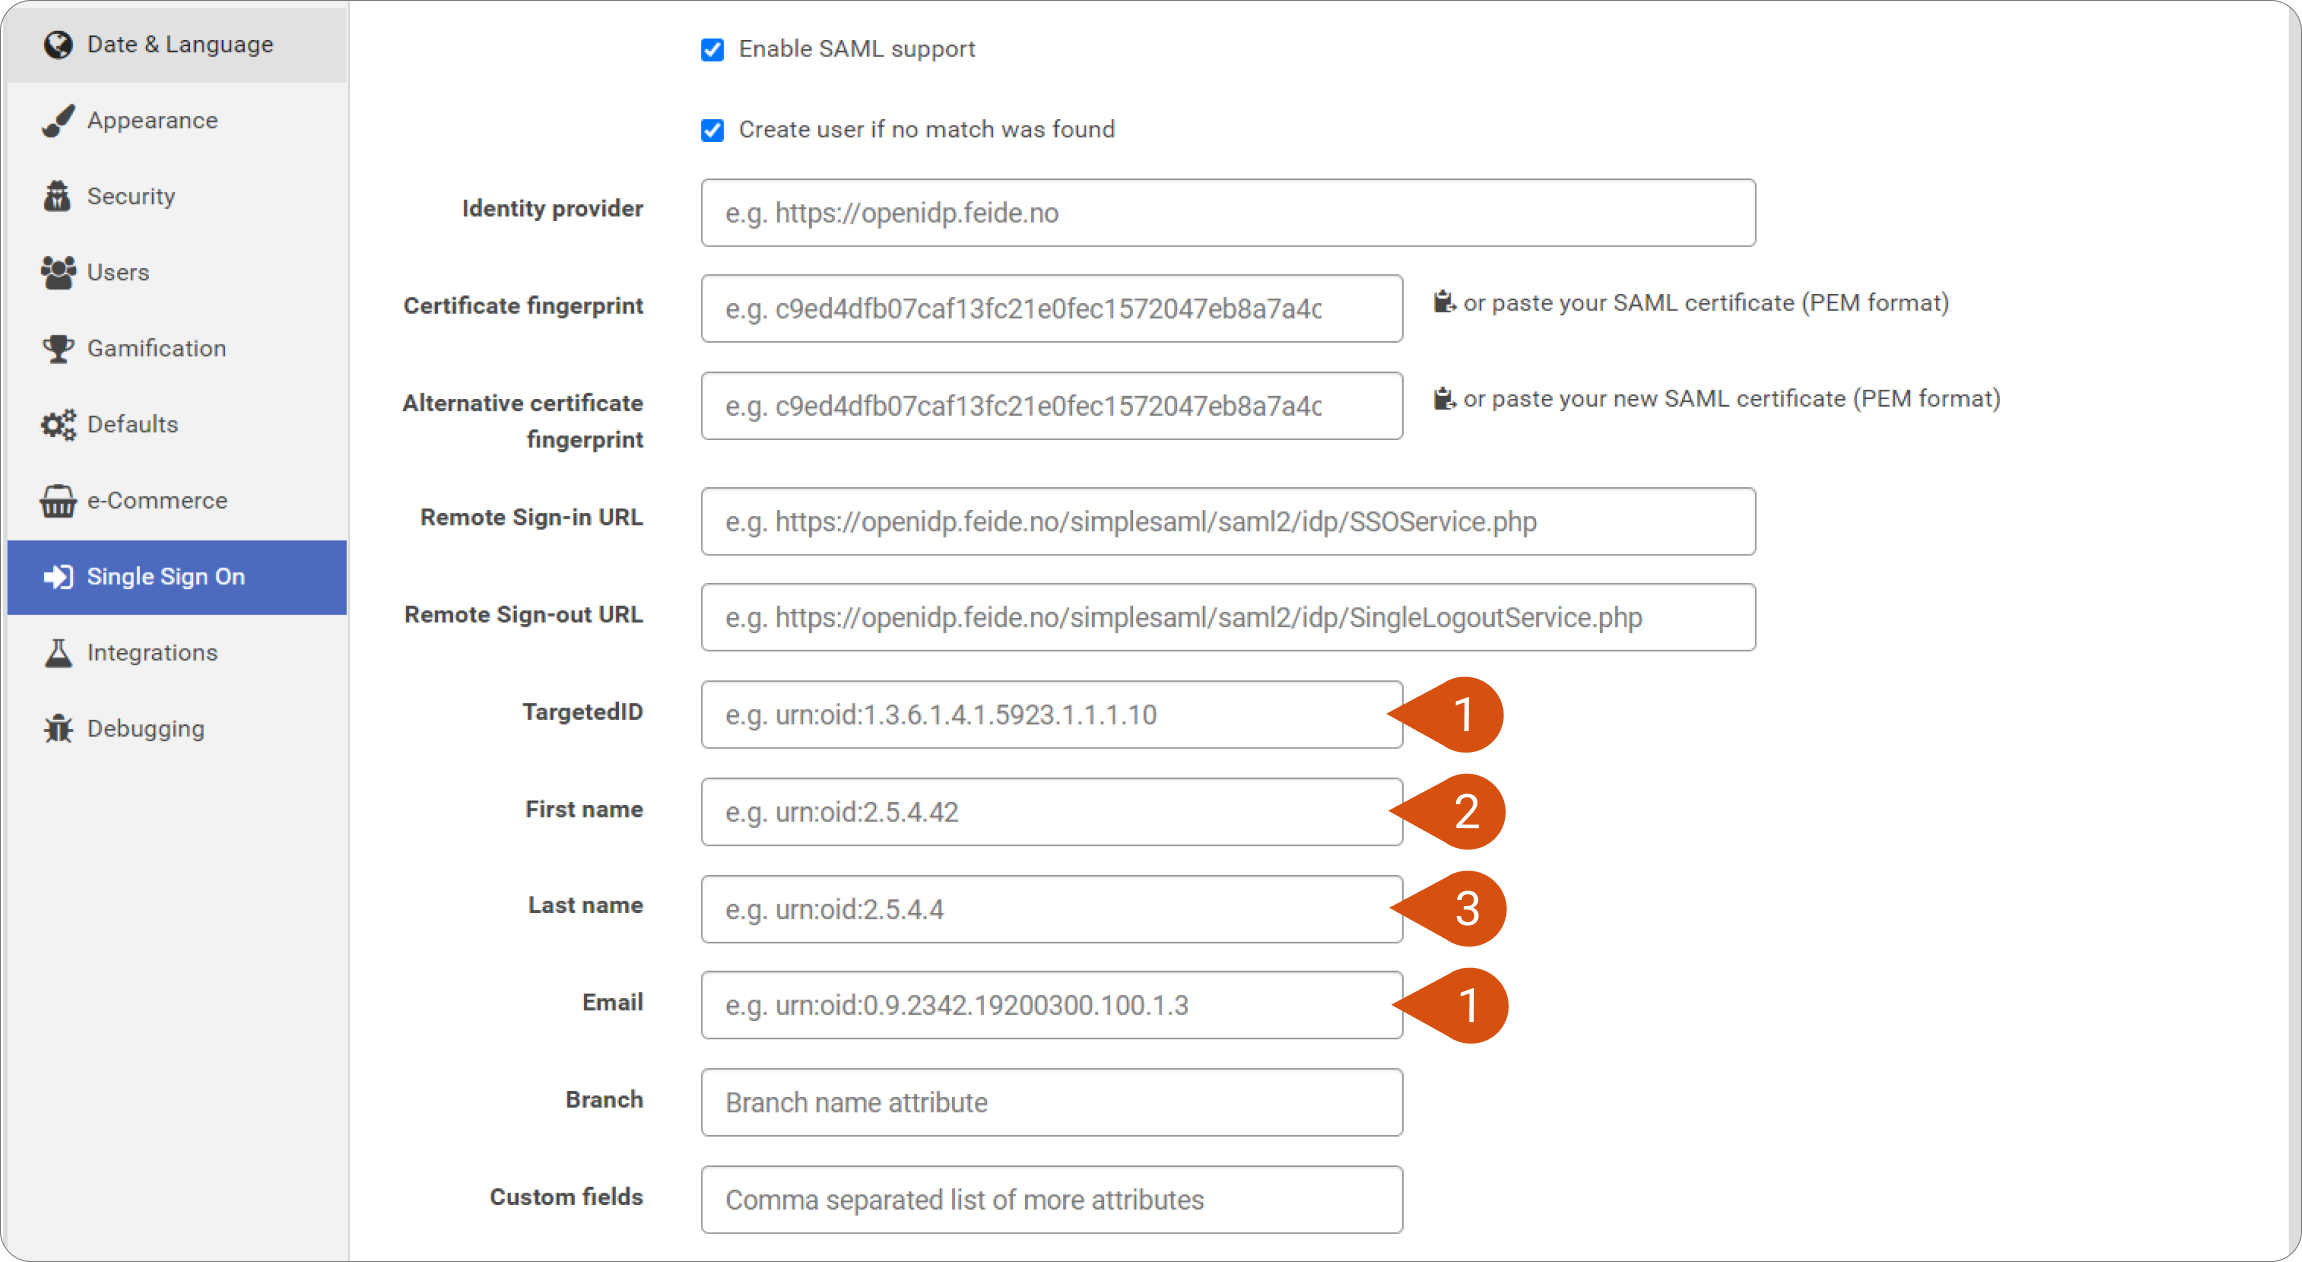
| Note: The claims value can be customized to contain any value. We are using the Azure user's email for both Email and TargetedID, which means that on LMS the user's email will also be his/her username. We recommend this option to reduce compatibility issues. |
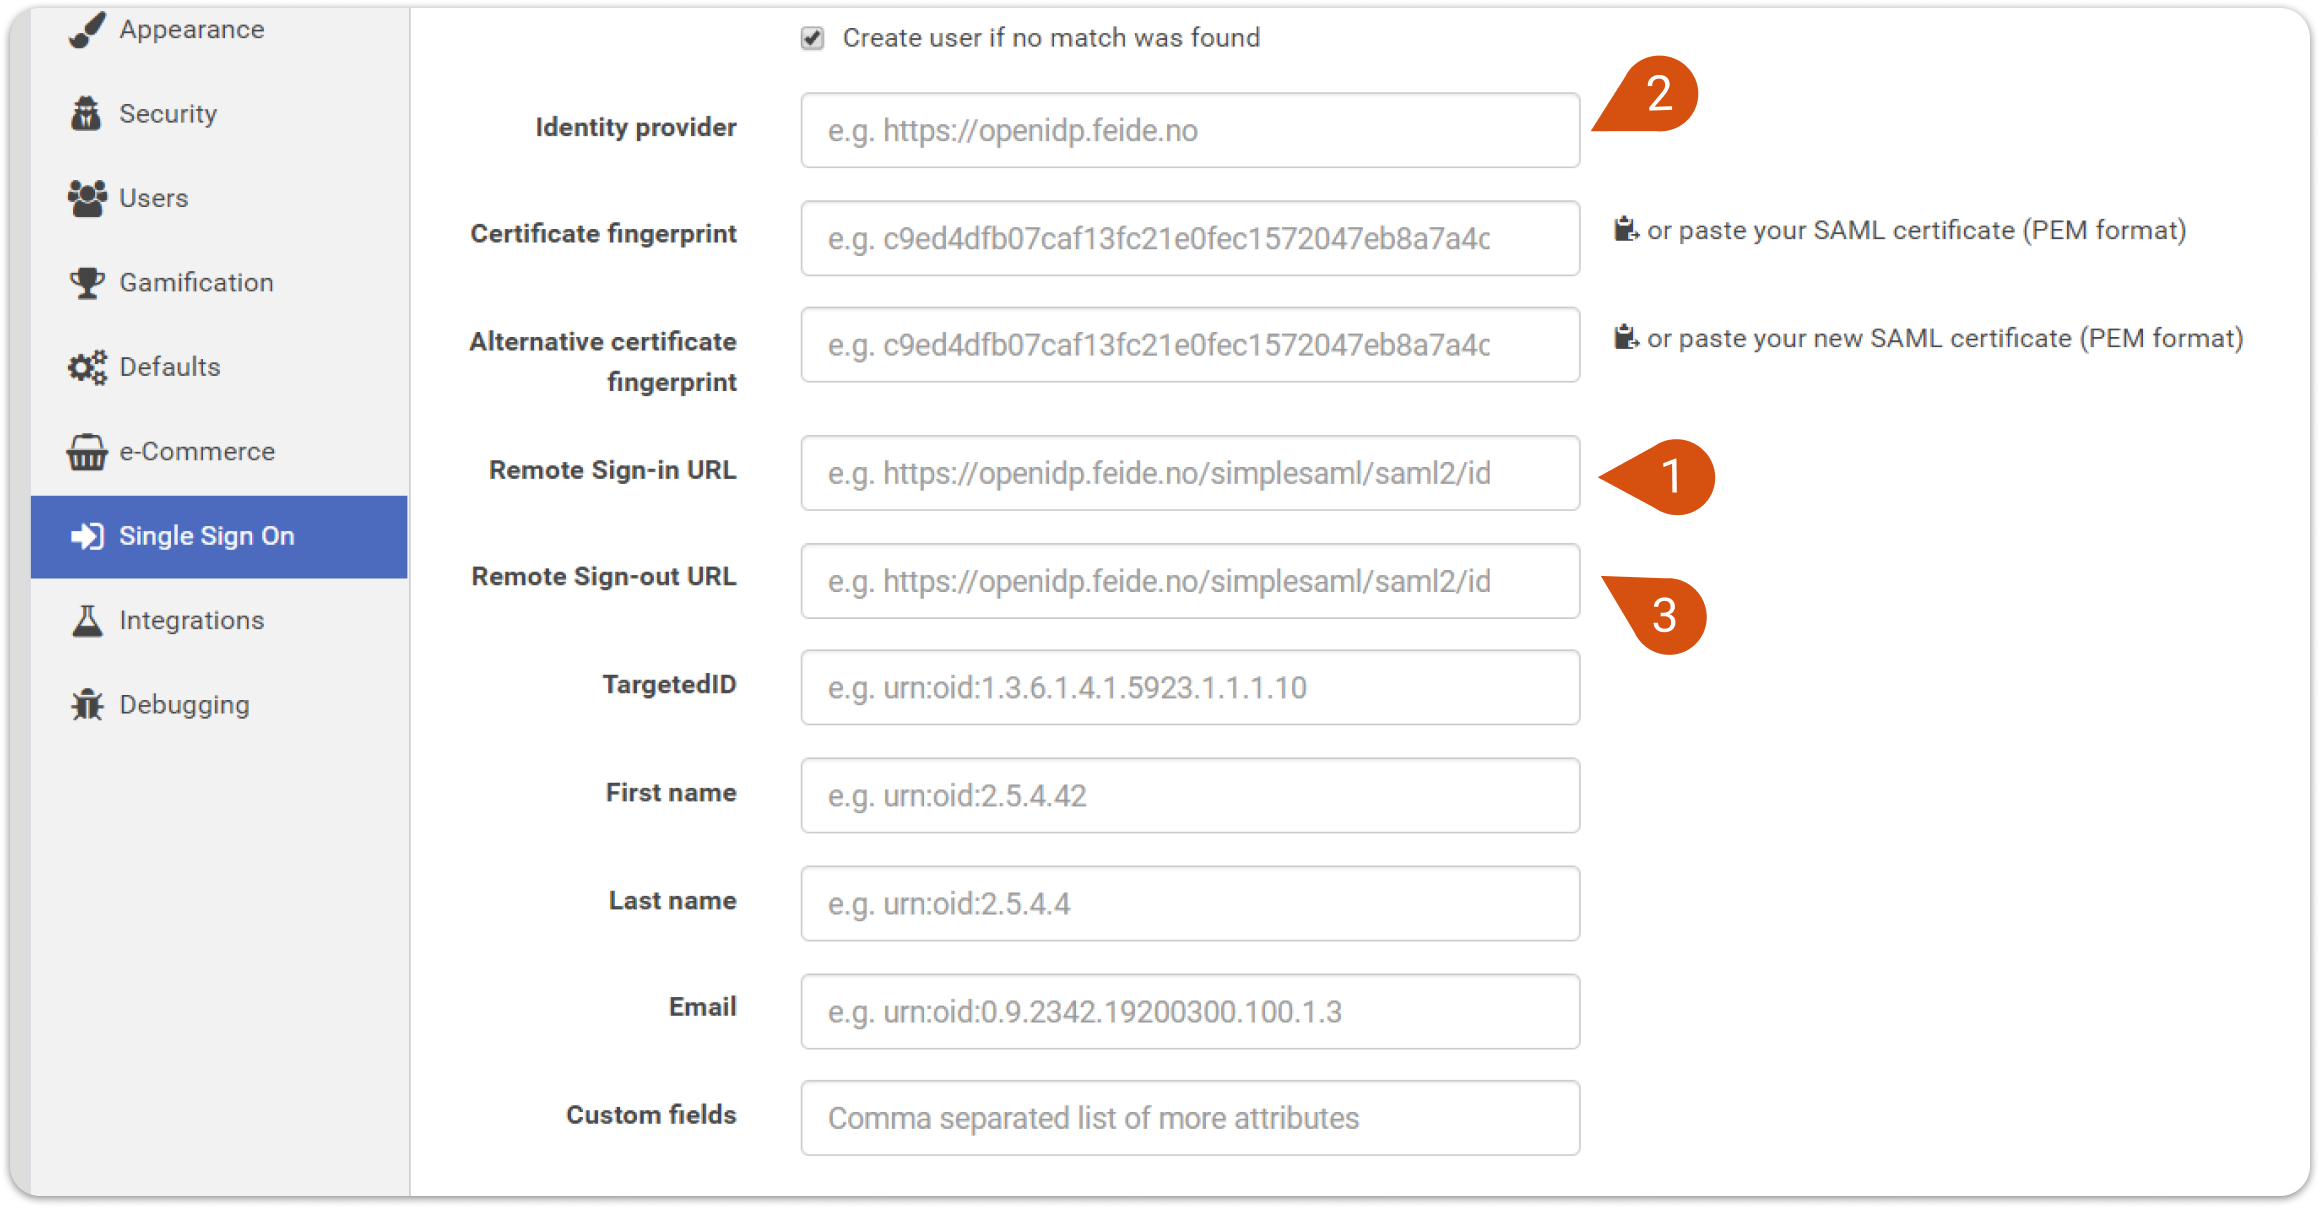
5. Copy the Thumbprint (1) and paste it into the Certificate Fingerprint on LMS SAML settings.
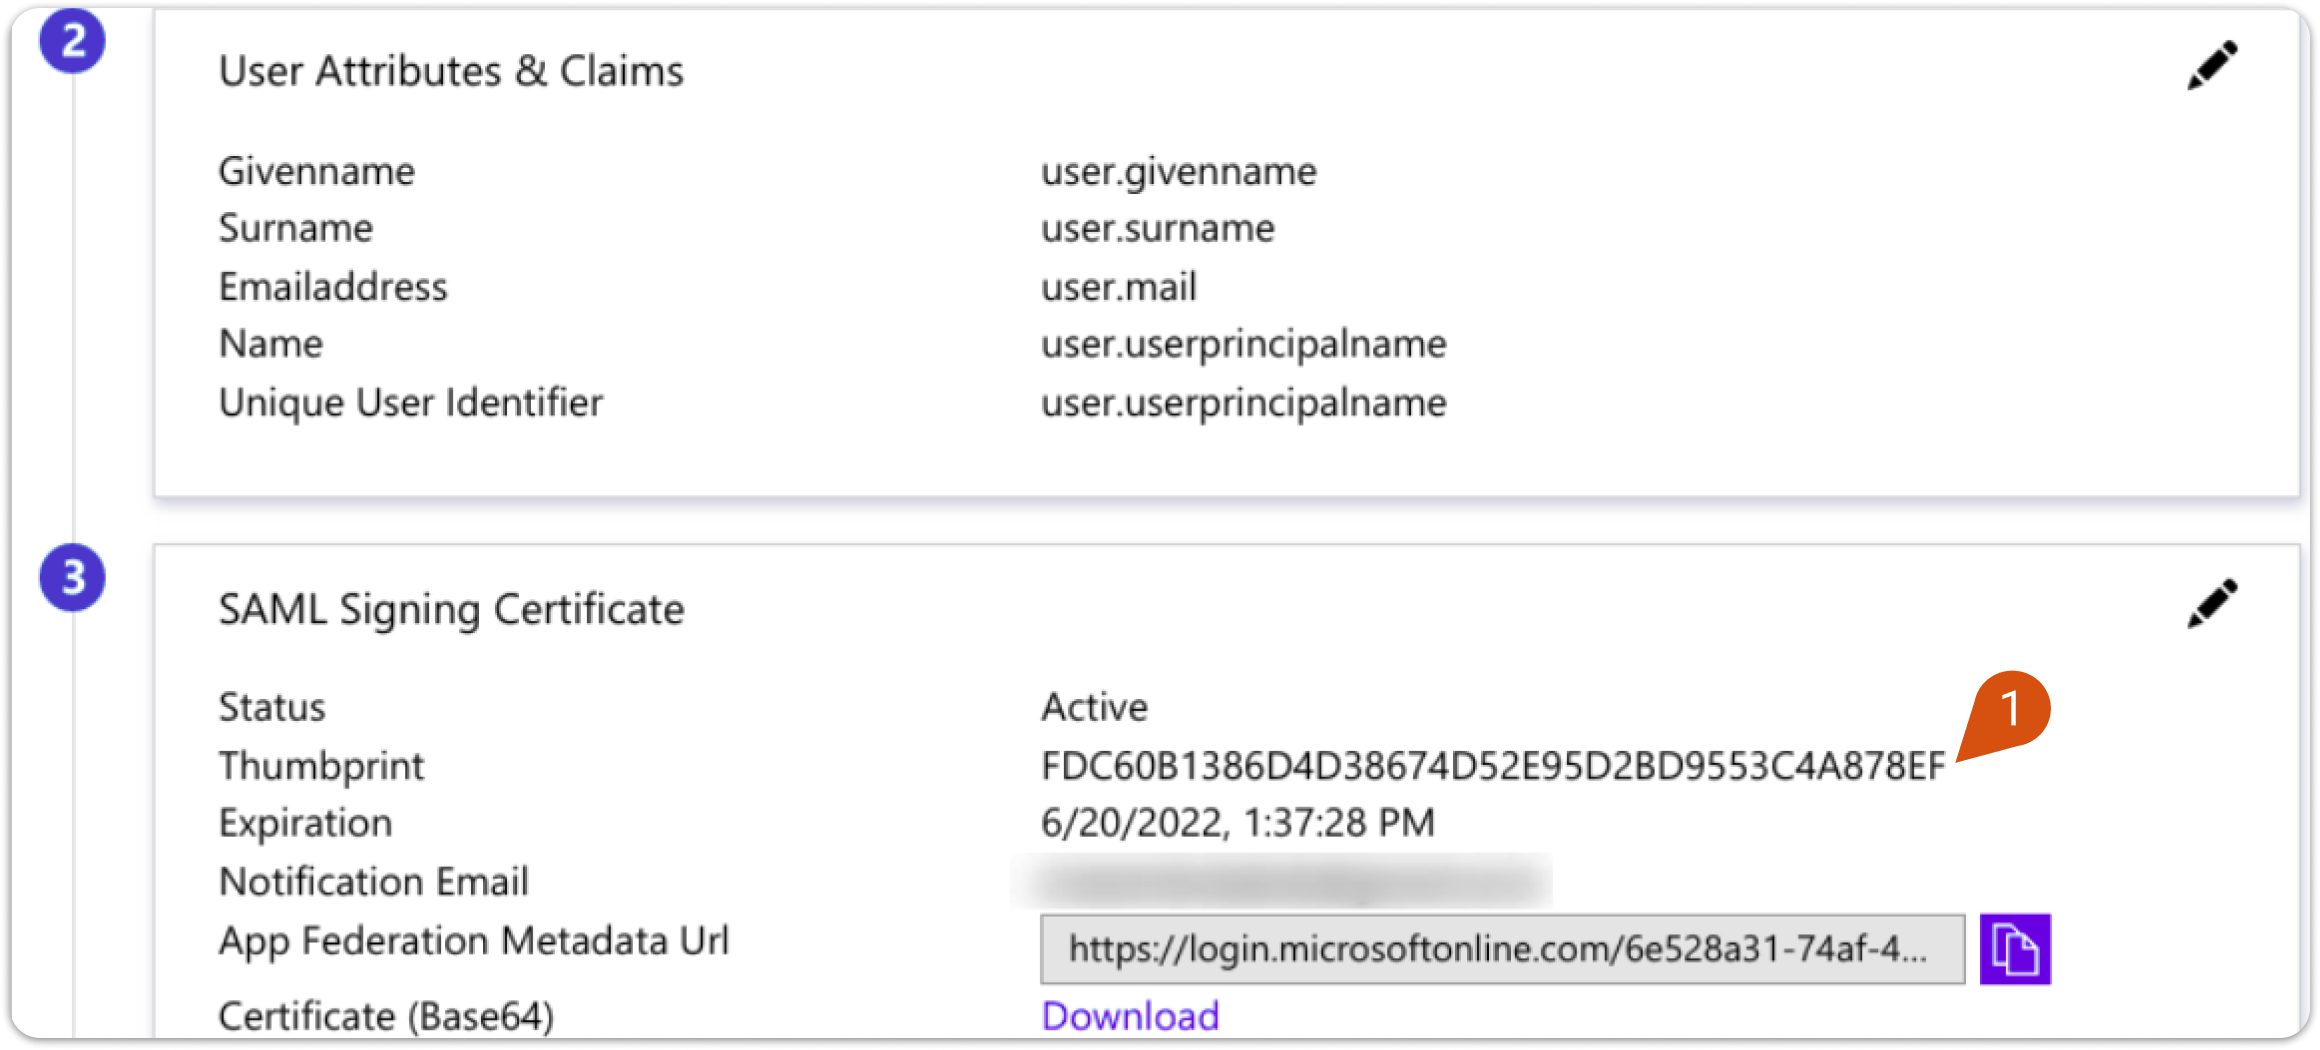
6. You will need to enter the provided URLs in the fourth section into LMS SAML as follows.
| Azure | LMS |
| Login URL (1) | Remote Sign-in URL |
| Azure AD Identifier (2) | Identity Provider |
| Logout URL (3) | Remote Sign-out URL |
| Note: In the following image you will see matching numbers. You will need to transfer the URL from Azure AD settings (image 6) to LMS SAML settings (image 7). Use the numbers to match the respective information. |
Image 6
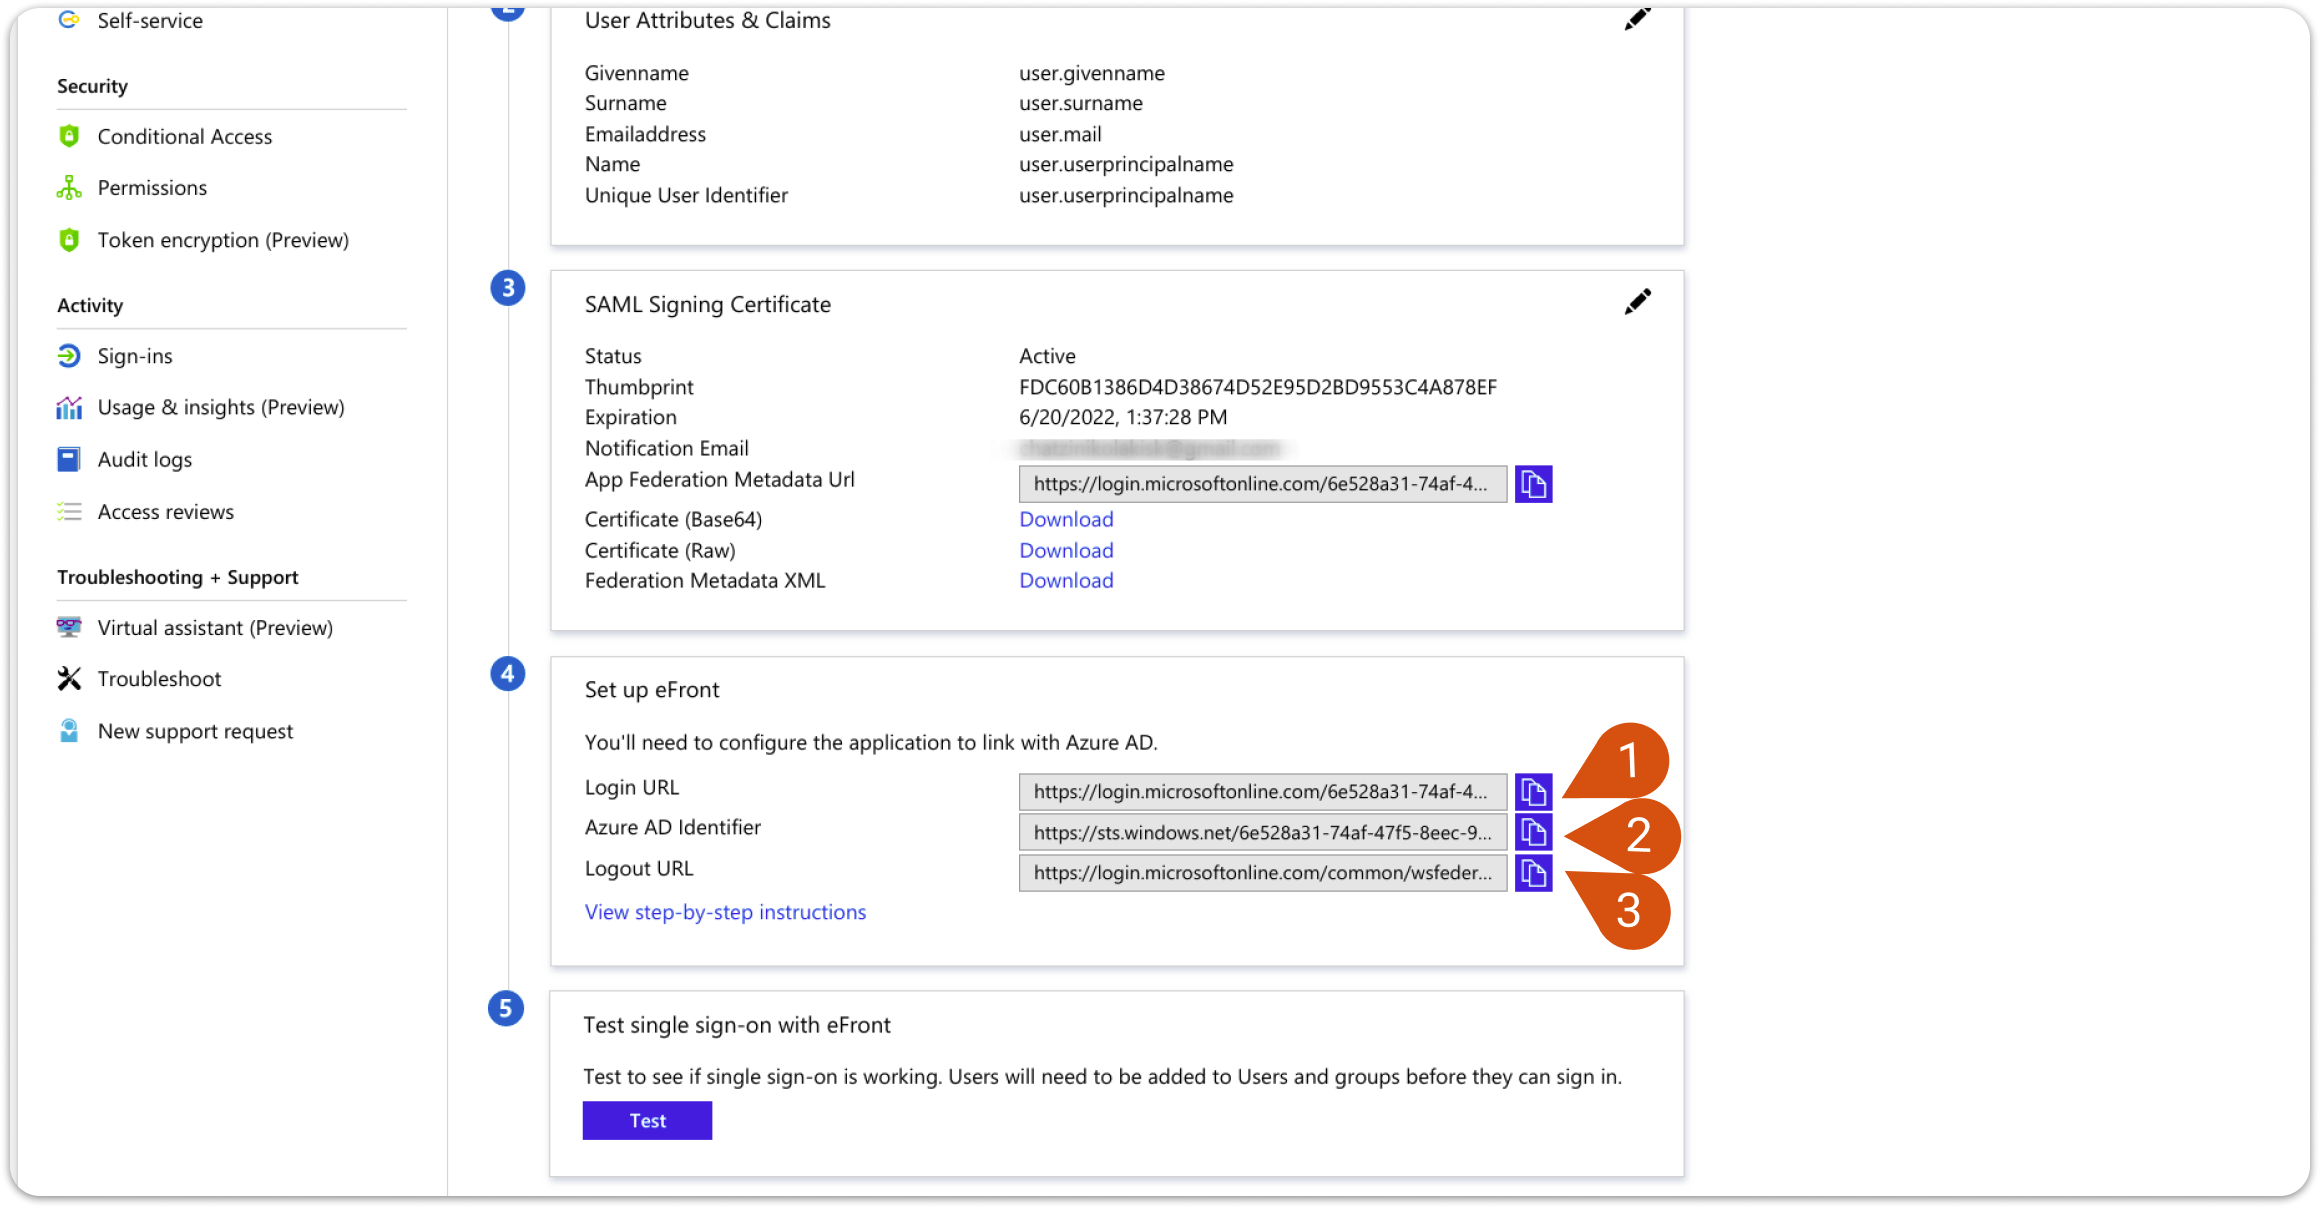
Image 7
7. After entering the above data in their respective entry fields, click on SAVE in LMS portal.