Users can be added manually or via bulk upload.
Adding Users Manually
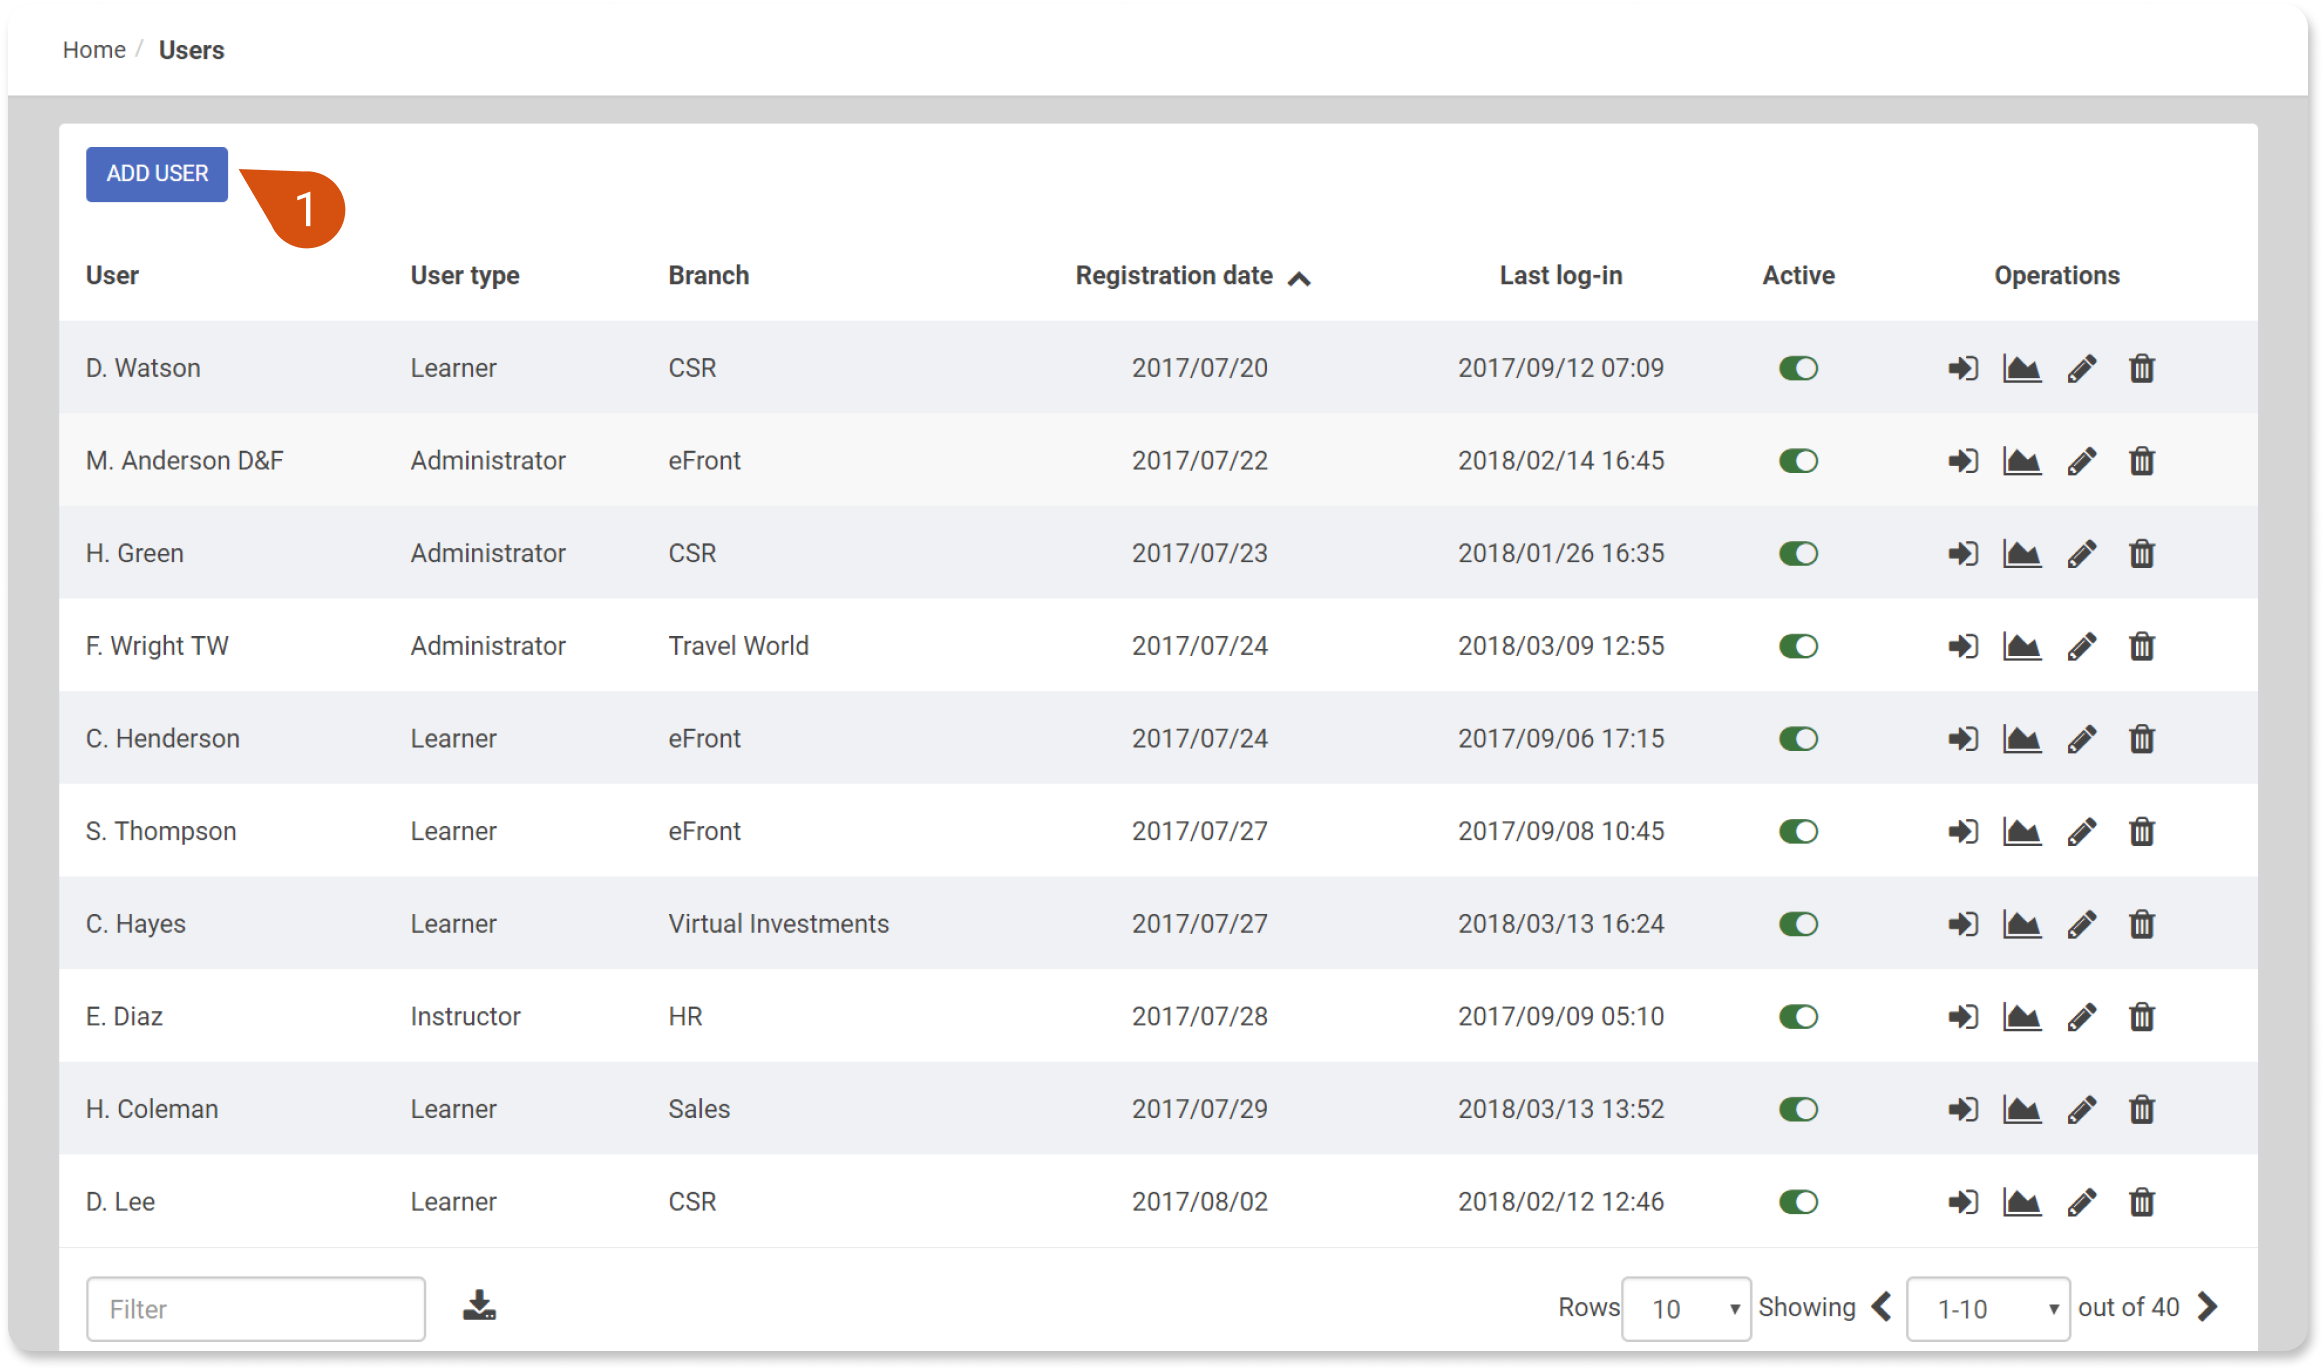
Step 1. On the Users module, click the Add User button (1). This will take you to the form for adding a new user.

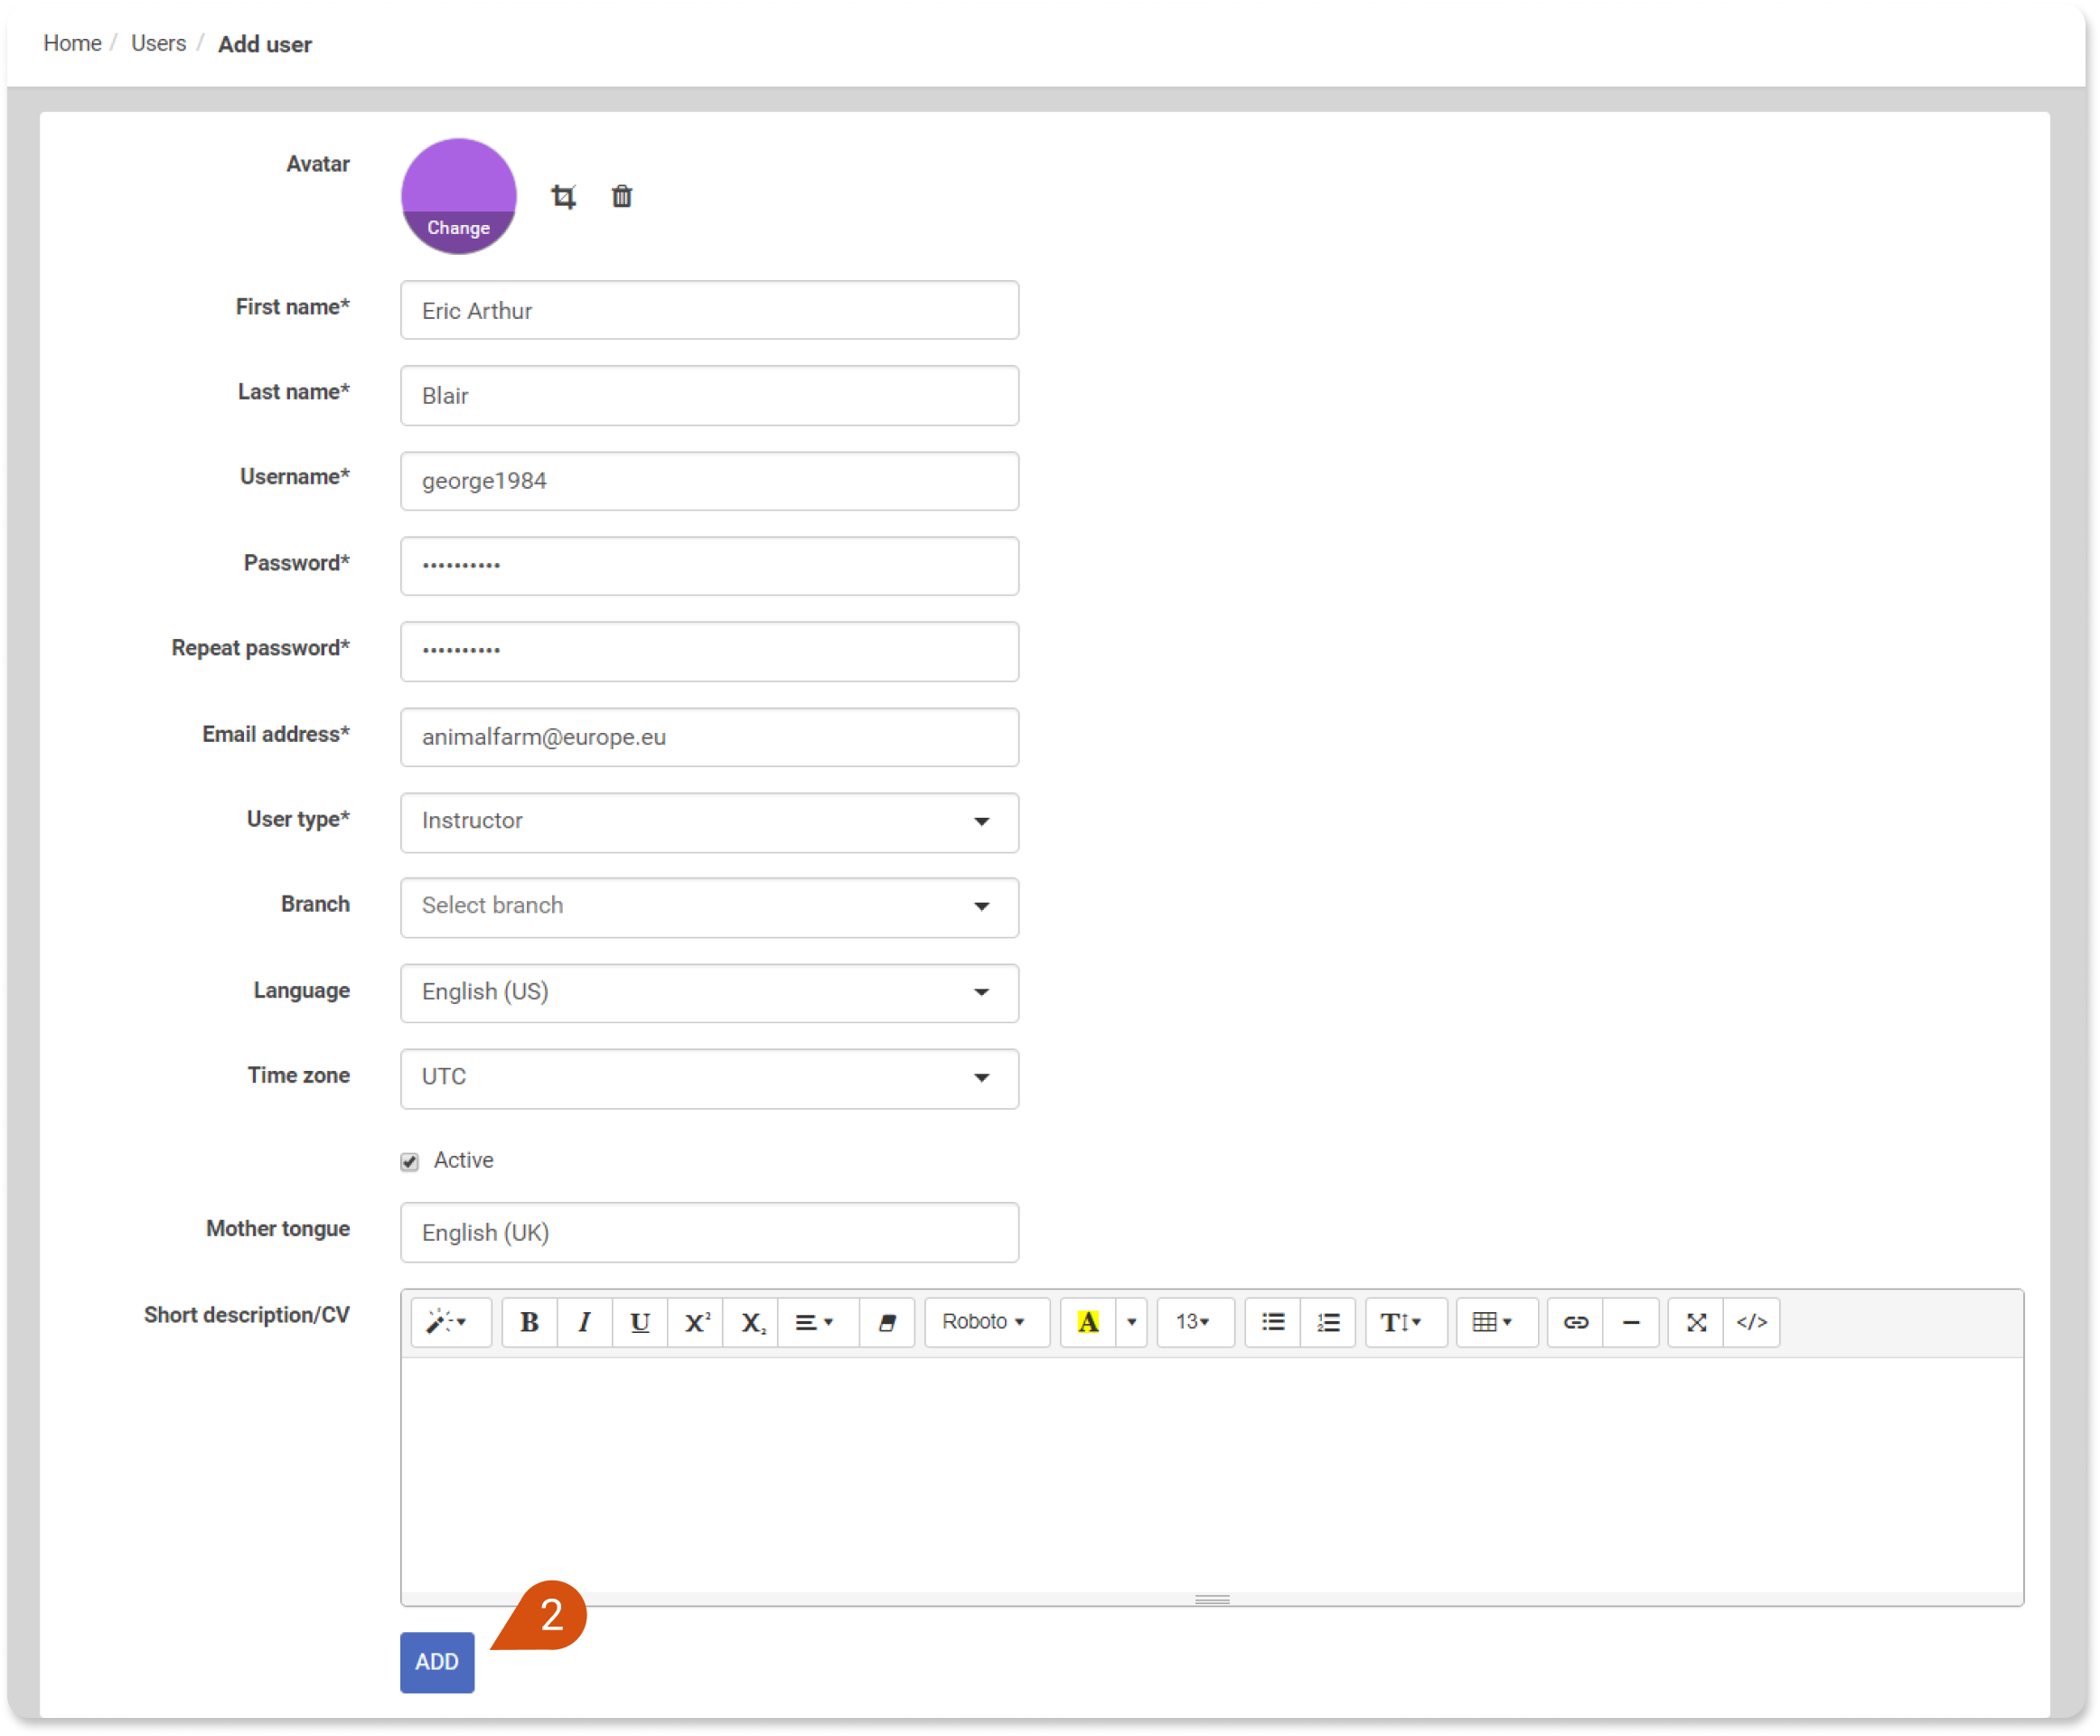
You can also add a short description or CV for the user. After you’ve completed the User add form, click Add (2) and your new User will be created.
Importing Users (Bulk Upload)
 This option is only available on the One for Business Enterprise plan
When you have a large number of users, use this option to Add Users at once.
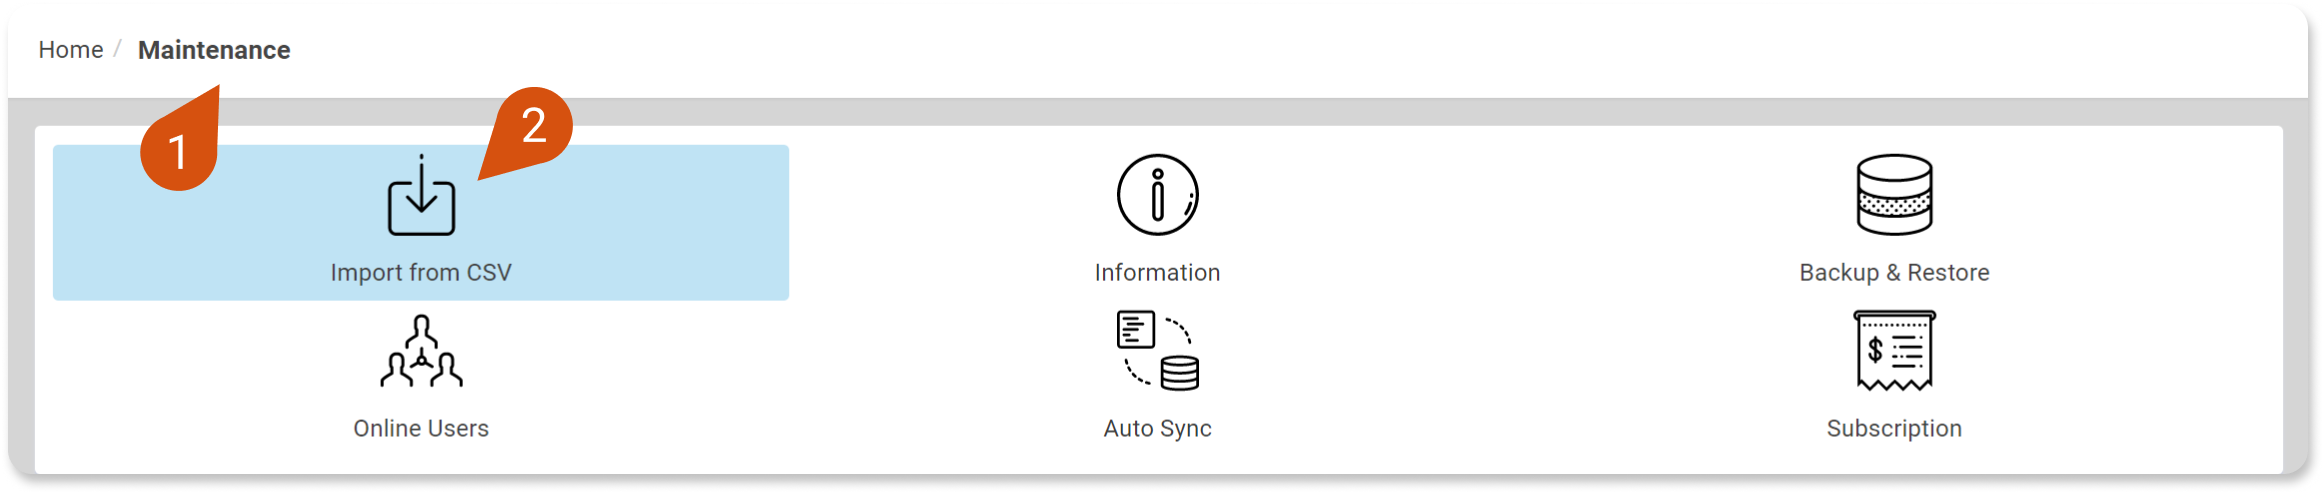
Go to the Maintenance section (1) through the admin homepage and select the "Import from CSV" (2) option.
Through the Data type drop-down, select the Users (3). The Available fields section (4) show the required fields that your file needs to have. Prepare your CSV file to match this fields, upload it (5) and click Import (6).
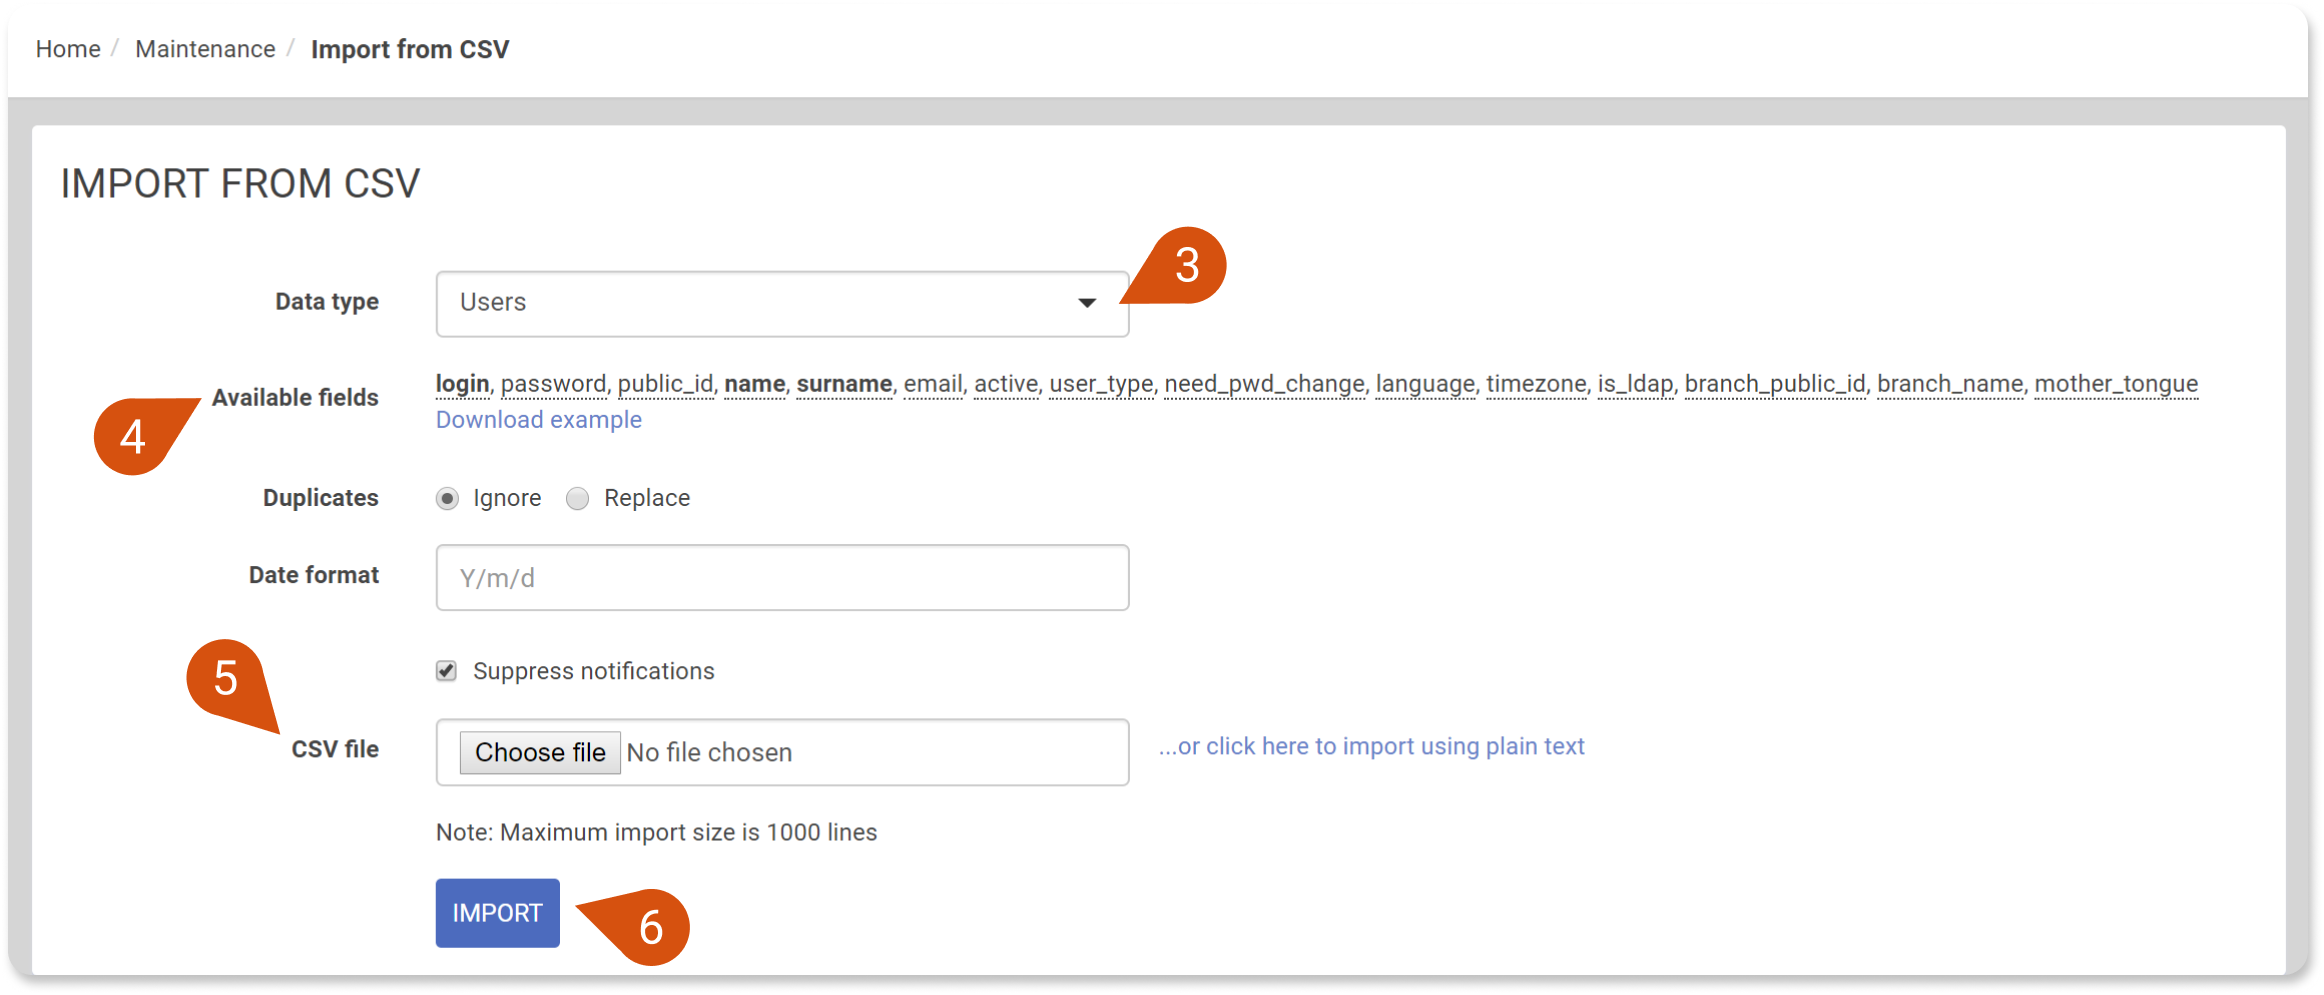
You will notice an option called "Duplicates". In case the file you are importing, includes users that already exist in your system, you can select one of these options:
- Ignore, so that a new user will be added
- Replace, so that the existing user will be updated